Tuesday 4 June 2019

Viking Dress in Jersey

As the Hobbit and LOTR are largely inspired by Nordic legends, I thought I'd put a Viking dress into my final collection. It's pretty much zero-waste too.


viking-dress-pattern

  • ribbing
  • overlock seams
  • overstitching
  • using clear elastic as a stabiliser on knits
  • marking jersey (use a marker pen). 
I haven't perfected the neckline though (and it bothers me).

I recently got an overlocker on eBay (Toyota SLR4D) and finally have it working properly (turns out the tension discs just needed wiping out)! And learning to work with jersey is one of my goals for my FMP, so I'm making this dress from either jersey or ponte knit (which I have to test sew because I haven't used it before and it's different).

This dress took me about 4 hours to make including cutting. I'm reasonably pleased with it and I will be wearing it, even though it's a size 10 and I'm a 6.

I suppose this answers how RTW fits pretty much everyone since jersey became the norm.

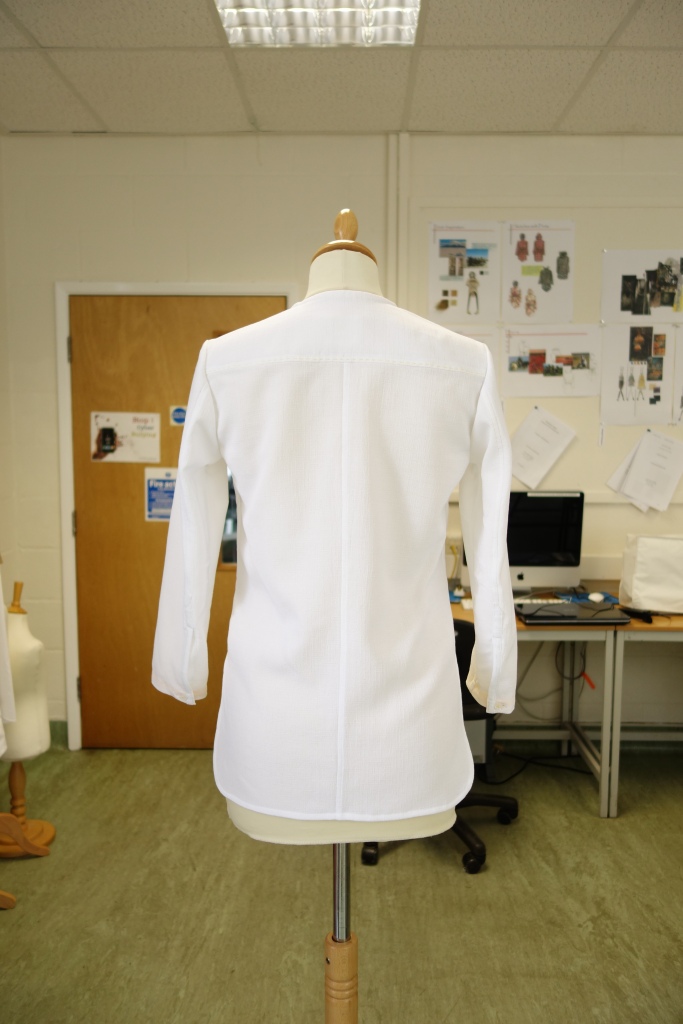
Now, you may have noticed that the sleeves are a little snug in comparison to the dress form. This is one of the reasons we toile. :) I have made them bigger on the pattern.

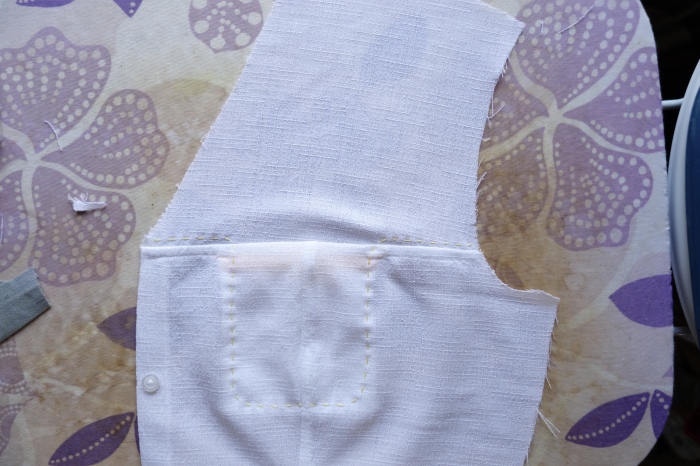
The pockets were going to be sleeve segments, but I thought pockets would be better (because who doesn't love pockets?!)

New skills used in this dress:

I got the fabric yesterday at The Shuttle in Leeds. I went on a fabric sourcing trip with the class, which was fruitful, though I still have a few more things to get, like sweatshirting and gold-coloured denim. I estimated my final collection will cost up to £300 in supplies. Not bad really, considering in London it's not unusual to pay £7,000 (but that includes paying people to make it for you, which we don't do).

I have updated the pattern to work with the changes in the sleeves, and will try it next in a t-shirt, perhaps with the lace at the shoulders too.

If you'd like more timely updates, don't forget to check out my Instagram!


Labels: , , , , ,

Sunday 26 February 2017

Twisted Seams in Jeans

I know I haven't mentioned it on here yet, but I'm onto my final collection of my BA (Hons) Fashion Design & Production at York College. It's called The Shire and is based largely on The Hobbit and LOTR (follow my Instagram for better updates). I've more or less got my final designs and two of the garments are jeans (oh yeah, I now work at Levi's in York City Centre as a stylist and tailor). There will be a pair of Mom Jeans and a pair of skinny jeans. First I'm working with the Mom Jeans.

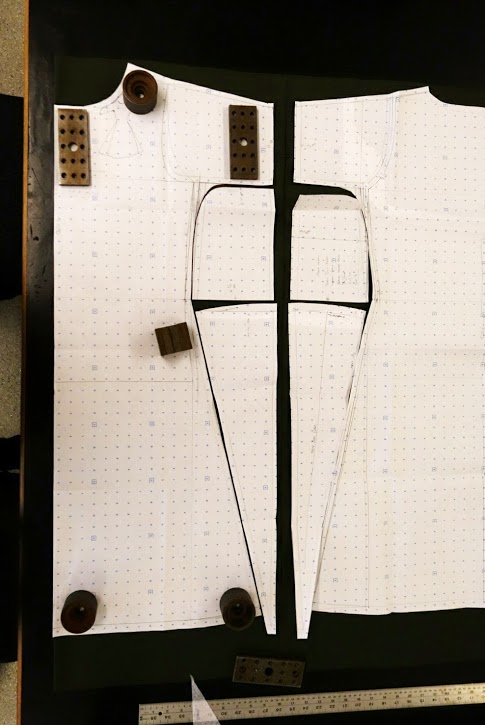
At Levi's we have some jeans like this. They're a slim, relaxed fit in the leg, with a good fit in the bottom, and a fairly straight waist. The latter is something I will not be incorporating because I like my jeans to stay up without a belt, but the legs are good and I want to use that look. So I compared the cut with those from Metric Pattern Cutting for Womenswear and found that they are wildly different, but both look good. The latter didn't look Mom-jeanish though when I toiled them.

This is what the Metric Pattern Cutting Jeans look like if you widen the legs to make them Mom-jeanish

This is the shape of Levi's jeans like the 501s, Wedgie-fit, and 501CT (from memory)

Now, bear in mind that the first ones are size 12, and the latter ones are my size (approximately 8) so mine are narrower. The legs on the Levi's jeans are much straighter at the outseam than the Metric Pattern Cutting ones. The alignment is also a lot closer to the side seam; you could very nearly make selvedge jeans with that pattern!

So I printed it out in my size and toiled it. All going to plan, but I made the pattern too long and shortened it on paper. This is where things began to go awry. When truing the side seam I forgot to take account of the yoke on the back, so the front pattern ended up 3cm too short, and of course I didn't realise at the time.
I noticed something was wrong when I was sewing the inseam and the back was not only not shorter than the front (it should be) but it was too long by a fair bit. I just cut it off the crutch with the overlocker (bad move). Now the inseams matched. So I sewed the side seams, and realised that it wasn't just the inseams that wouldn't have matched. I carried on sewing and tried the toile on afterwards.


Now, the first problem was the bum-nose. I do not wish to appear as if I have a tail tucked in there. I assumed that this was probably due to the issue with the crutch seam, so I moved on.

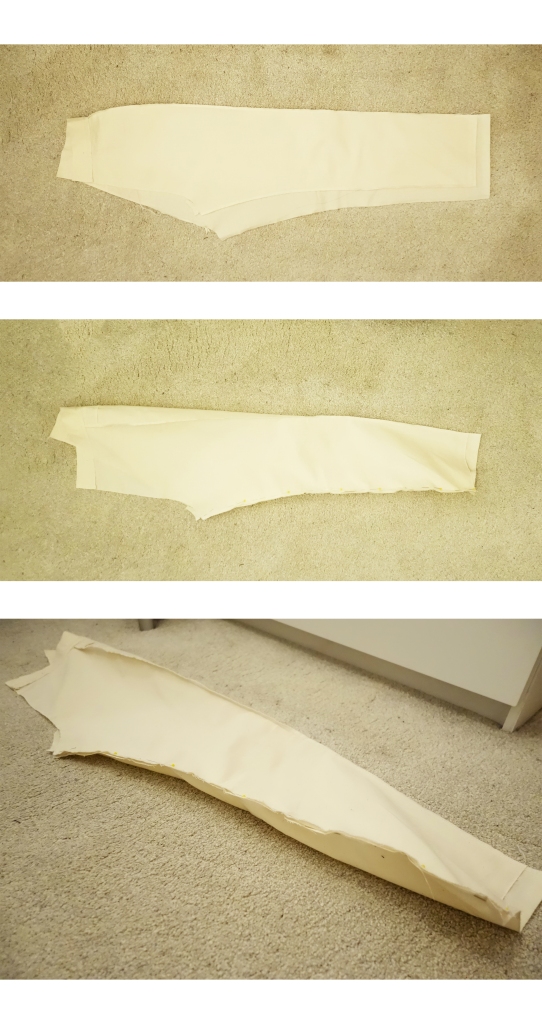
Another issue came to my attention when I looked down. The legs had twisted symmetrically. I could not fathom why. Levi's jeans didn't. And my toile wasn't even in twill so that couldn't be it. Surely it must be the fit?

I cut up one leg and examined the new shape. It was... odd.

Front leg of toile
Rear leg of toile

Now, I assumed, based on half-remembered facts about twisted seams, that I must adjust the pattern to make the jeans hang right when I wear them. So I spent a good few hours playing with the pattern on Illustrator, in vain, because I couldn't get the seams to be corresponding measurements. After said good few hours it occurred to me to get the toile out and examine it again. I thought, What would happen if I lay the legs as they would have, had they been the same length to begin with and I hadn't chopped that bit off?
And this is what happened...twisting-legs The back leg's inseam was 3cm lower than the from leg, but sewn to match it, so the grainlines were not level. This meant the leg was trying to level itself out. As it couldn't do that magically, it twisted round like a spiral staircase. It sort of makes sense and evidently is what happened, as you can see in the above photo. Accidental Pattern Magic. As proof, if I lay the front leg properly across (as it should have been) all it well. I wore it pinned for a while correctly and it didn't twist. I didn't take any pictures of this (but I'm going to re-toile to eliminate this issue and check the fit otherwise).

So there we have it: the (or a) cause of twisted legs in jeans is when either the front or the back isn't level (maybe because the seamstress/seamster stretched one of them and cut it off to match). I think this happens more if the problem extends below the knee.

I'm glad I learned that little tidbit, especially as I want to be a Master Tailor at Levi's. :)

Labels: , , , , , ,

Sunday 19 February 2017

I love free-motion work!

As part of my most recent module at college, I started doing more free-motion work. I'd done some before, without a free-motion foot, but not very much. I think I decided to do it more here because the concept seemed to suggest embroidery and I was NOT going to do it by hand (too time-consuming for college). So I got a Bernina foot #24 and watched some videos on YouTube.

I found out that not only can you do absolutely beautiful embroidery by free-motion, but you can make lace! It took a few goes to get anything really good, but I soon picked it up.

Free-motion lace

Free-motion lace


Free-motion embroidered Celtic Knot design


Helpful sources on YouTube include:


There were some others too, but I can't find them anymore.

There is also this fascinating ebook I found (please note I do not have the rights to this ebook, but I don't know where I found it).

singer-sewing-machine-art-embroidery

There are more of my samples on the Pinterest board for this module. Free-motion is my new favourite thing! :D


Labels: , ,

Friday 12 August 2016

How to measure yourself (or anyone else) for a skirt draft

This is a throwback to a post I did a while ago on how to draft a skirt pattern. A reader messaged me and asked for a post on how to properly measure oneself, so I said I would do one. And here it is :)
 
The first thing to do is to tie some tape round your waist and your hips to keep a level. This is easier if you have a full-length mirror, which I currently do not. -_-


To get your front and back waist measurements place the end of the tape where you feel the side-most point of your waist it (this is all a matter of what feels right), wrap the tape around your waist and use your thumb nail to mark the other side-most point. Hold that and the waist measurement point (good thing you have two hands) and make a note of them.


Do the same for your hips. Be a little slack on the front of your hips if you like, especially if like so many of us, you have a bit of a tummy. :)


And do the same for your high hip measurement. This is along your pelvis bone line. On me that's 8cm down from my waist at the CF. I know the measuring tape drooped a bit in the photo.

You will use this measurement to check that the darts aren't too hollow and the side seams aren't too curved when you shape them. I once scooped my back darts too much and now I have a high-waist skirt. :)


Measure from the waistline to the hipline front and back.


This is why a mirror helps: my hip tape dropped a bit at the back in the photo. :)

To make this easier/quicker, I've added an Excel file for you to download. It makes it quicker to get your dart measurements and so on ready for drafting your skirt pattern. Click here to access it via Google Sheets.

And here's the link to the original post.

SaveSave

Labels: , ,

Thursday 28 July 2016

Summertime Shorts

We've been having a heatwave here in Britain, and I needed some more shorts. I had what I thought was a pretty good pattern, but measuring the waistline I wonder how on Earth I ever managed to zip my un-stretched shorts up! I must have made some colossal mistakes when measuring or something because I've had to increase the waist measurement considerably (and, no, I haven't got that much bigger -- as if I could gain weight!).

The inspiration for these shorts is a blend of Audrey Hepburn's shorts in Sabrina, and some shorts I have already designed and made. They are quite short, but not hot pants, and I've flared the legs a bit since toiling so they will hopefully be a bit more elegant.


Toiling


The initial fit (after adjusting the waist measurement on Illustrator) was pretty good. The waistband pokes out a bit at the front, but I think that's due to the fairly straight waistline on the front pieces. I've corrected that since. The waistline fits actually on my waistline all the way around. They're comfortable.

I did have a 1cm discrepancy on the inseam -- the back needed lengthening there, but now it matches the front. I think that may account for the funny fit on the toile.
I've since flared the back leg pieces so they don't cup the cheeks so. I was working off a photo of Audrey Hepburn:
Audrey Hepburn filming for the film 'Sabrina'
There seemed to be some variable camel toe on the front. It wasn't major and I wasn't sure what to do about it, so I've left it for now. We'll see if it disappears when I use proper fabric. :)

Making


Front of shorts. I will change the pattern so that the pockets start farther from the centre front.


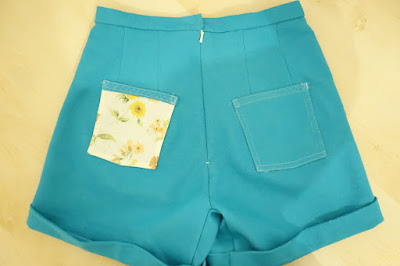
Back. I love how neatly this invisible zip turned out!


That caterpillar thing you can see is the hand-stitched bar for the hook and bar fastening.


Hand chain-stitching along the front pockets


The gusset not only makes these shorts so much more comfortable for cycling,
but it improves the look of the fit too!


The cuffs. I pressed them, but they still need a little help to stay up neatly, so...


... I hand tacked them up at the front and back of each leg.


I was going to have the back pockets match, but I like the lining (Liberty cotton) 
so much that I have it on show! And I used a serpentine stitch along the tops
of the back pockets, just because it's pretty. :)


The hems. Overstitched, herringbone stitched, and topstitched about 3mm
from the cut edge. I will increase the hem allowance on the pattern. :)


Front view


Side view with pocket


Profile view. A somewhat more discreet fit than the toile, I think. 
And I'm glad they didn't turn out to be 'flared'. :)


I'm happy with that fit. One day I will master the back view shot.


Outfit shot. I love this sweater from The Sweater Shop in York, 
and my boots from TKMaxx! I'm not being paid to say that. Well, unless
The Sweater Shop sees my photo and gives me 10% off my next purchase :).


All in all, I LOVE these shorts! They’re so comfy! They fit just right too.

Sabrina


Labels: , , ,

Monday 14 September 2015

My Cut21 Jeans -- The Test Ride

Last week I had a job interview at a bike shop in York and made some jeans for it. They were the Cut21 Jeans made over my jeans block, so the fit is a little different, partly because there were some changes I wanted to make, like narrowing the legs.
DSC06379
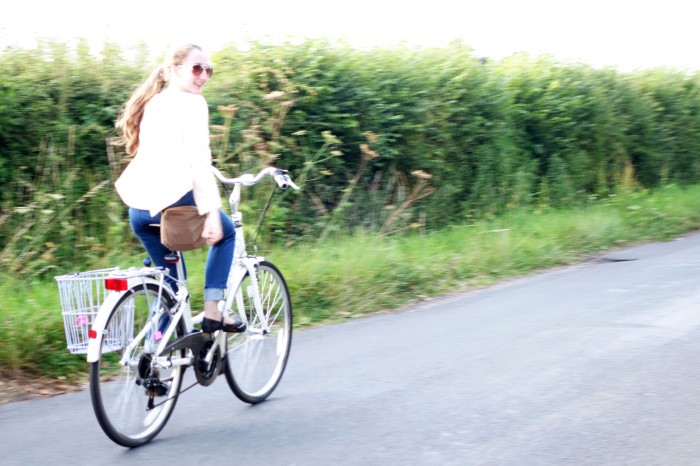
Cut21 Jeans test ride, worn with Cut21 Jacket Toile and Cut21 handbag.
The jeans are getting more comfortable as I'm breaking them in. I'm used to stretch denim or skirts. Mainly skirts. They were not comfortable to begin with.
DSC06368
Cut21 Jeans front view; they slip down a bit because the waistline stretched a little during sewing. That is why "wad" appears. If I had a belt that wouldn't happen.
Aldrich's jeans and trouser drafts go right to the floor, which is about 8cm longer than a garment's inside legs would be, which is roughly what I have as my turn ups. It's lucky they are this length. When I drafted the pattern months ago I evidently typed in 120cm instead of 102cm, so when I printed out my pattern it were frankly too long. I shortened it and narrowed the leg to get this fit. I've corrected my Illustrator pattern now. :)
Many of the features of these jeans you have already seen on the original Cut21 jeans but, as I said, I changed a few things. Specifically:
  • the narrower leg (measured round my ankle with the tape at an approximated circumference)
  • no yellow hand-topstitching (no time, haven't bothered since)
  • and the belt-loops are now uniform in length and made from the selvedge, which I thought was a nice touch.
Making the belt-loops
DSC06381
The fit is pretty good (bear in mind that they are slightly crumpled here for having been worn while cycling). I can't really say whether the gusset improves comfort because I don't have any jeans without a gusset. It's not as nice as cycling in a skirt anyway.

Things I Would Like To Improve

  • The back pockets are a bit far apart. I think they could do to be 1.5cm nearer to the CB seam.
  • The little pocket that I was going to keep my keys in is too small for that, so it's really just for looks and I don't like that.
  • I still couldn't get the facing to be perfectly aligned at the CF. You can't tell from the outside, but still...
  • The waist is too low, and I think it stretched a bit during sewing. I suppose that is why they fuse waistbands in RTW jeans. I didn't do a higher back waistline either, so the whole waistline needs redesigning if I'm to make another pair.
  • The shape on the front waistline detail is not perfectly round.

Thinks I'm pleased with

  • Not one pin was used to sew these! (I've given up pins for sewing lately; I don't need them).
  • RTW fly front zip like in my brother's jeans (slightly different though as they use a felling attachment and make their patterns accordingly in RTW; you work with what you have)
  • The fit of the legs. It reminds me of Hiut denim (great company; I've never bought anything from them because I make my own, but they look good!)
  • The fit on the crutch -- no monobutt here!
  • They get more comfortable the more I wear them
  • They're real denim, not stretch stuff. It's so nice and the perfect step between weighty denim and soft denim, which is nice for women's wear. It got it from Merchant & Mills.
So they are my Cut21 jeans 2.0. They're going to look so cool with my Cut21 jacket (I'm working on a hack for that now)!
If you could make some dream jeans, what would they be like? Any special features? A particular fabric? Please do share in the comments below!
Sabrina

Labels: , , , ,

Monday 7 September 2015

My 4-hour Graduation Dress

Now, as I mentioned in the previous post, there was some drama (by my standards) when it came to what I would wear for my graduation, namely, I changed my mind last minute and whipped up a dress in four hours (and very pleased with that am I too!)
To recap, the original plan had been to make a Cut21 shirt in my size, but lengthen it to make it a dress, and wear a matching camisole and shorts to prevent see-through, thereby avoiding the vintage dress look. Yes, I know vintage dresses are still quite big up here, but I tell you, they're on their way out, at least with so literal an interpretation. Something more industrial, more utilitarian is coming. It's already visible in some places and it won't take that long to seep into the mainstream. But I digress.
This is my dress:
graduation dress -- front
Now, as mentioned in the photograph, there are several features of this dress with which I am quite pleased. What is not mentioned in the photograph (because I didn't want to clutter it up with text) is that I didn't use a  single pin to sew it. Not one. I am super pleased with that. (I think I mentioned so last post.)
The fit is wonderful because I made it from my own block which has taken months to get right, and still may have a few tiny niggles to work out. The princess seams are contoured, the darting is balanced for my figure, not some fictional one in a pattern book, and it skims the figure, rather than hugging it (which is especially nice in this hot weather). As Edith Head said: "Your dress should be tight enough to show you are a woman, but loose enough to show you are a lady." For those who think Aldrich's block has too much ease, this is the fit you end up with it you use her Close-fitting Dress Block, shape the seams, and work out the darting so that you have 6cm waist ease. There is about 5cm of ease at the bust, but not at the armscye level, because the armscye level is higher than the bust. So when you draft the block with 10cm total ease, remember that that is not the final bust ease. You've got to shape the pattern's figure yet.
To get the flare in the skirt I swung out the darts (now you can see where the front darts were because they have left two great big triangular pleat-like flares where they use to be) and then still had to add some more flare. (I think this is a clue as to how to draft a cowl neck that stays as you want it to, but that's another story...) This is the minimum I would want for a flared dress, but I will admit that it means you sometimes have to be careful on a bicycle in the wind.
It is practically compulsory for my projects to have pockets. I like to sink my hands into them, so nice deep ones are good. They are, of course, also very handy for putting things in. At my graduation I had my bottle of water in one pocket and my camera in the other. You should have seen Alice's face when I showed her! I had my gown over it all so it didn't show, and it saved carrying a bag (I don't bother with clutch bags because the whole point of a bag is that it carry's stuff so you don't have to).
There is very little ease in the sleeve caps. I tried sewing the first one like a shirt sleeve, but it didn't work out very neatly (it's the thing that bothers me most about this dress). So for the second one I crowded the ease in as I learned in Sandra Betzina's Power Sewing book (which I gave to the college because, while there is good information in it, it is still home-sewing level, and I want RTW methods). Then I sewed it in shirt-sleeve style, matching up the top notch with the shoulder seam and spreading the eased cap over the armscye. No pins. :D
The hems of the sleeves are 0.5cm, 0.5cm double turn, single-stitch. The dress hem is 1cm, 1cm, double-turn, single-stitch. The measurements are by eye, so I think the dress hem is actually more like 1.2cm, 1.2cm, but that's just a matter of practice. It seems to have roped a bit, so next time I do such a curved hem, I'll do a narrower allowance. I had planned to, but sewing late at night, mistakes get made.
Which leads me to the zip. An invisible zip because I had only drafted a 1cm seam allowance with symmetrical backs. I used the method I learned on Fashion Incubator. Why don't all sewing instructions use this? It's so easy and gets a professional result! It's way better than the home-sewing ways you find in books and commercial patterns. I just don't understand it. Anyway, the mistake I made was that I sewed one end of the facing on with the rest of the facing twisted so I had to unpick it. Simple, but bothersome. I'll put it down to late night sewing (a very handy excuse).
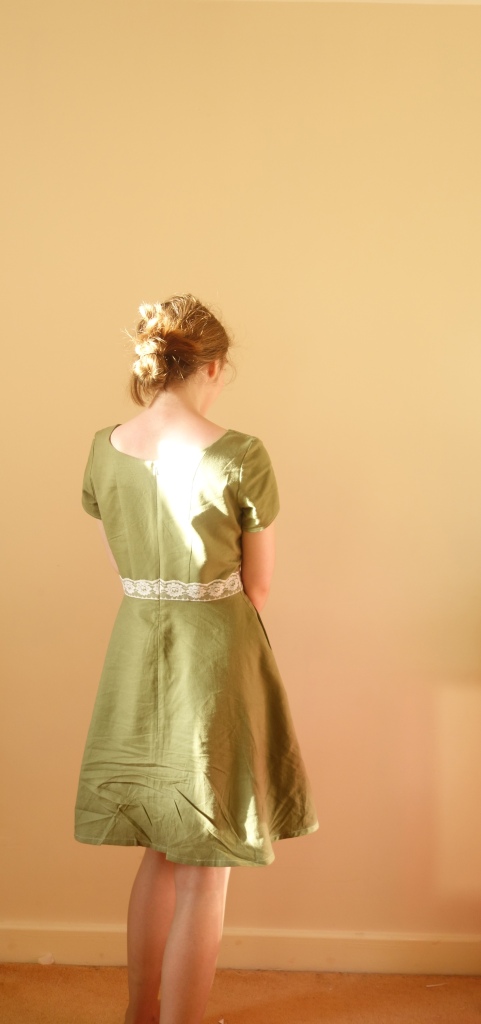
BACK VIEW Please ignore the creases; I have been wearing this dress for about a week.
BACK VIEW
Please ignore the creases; I have been wearing this dress for about a week.
Because of the wider neckline, a lower back neck works well. The zip is just at the right level that I can fasten it in one go, without having to reach over my shoulder.
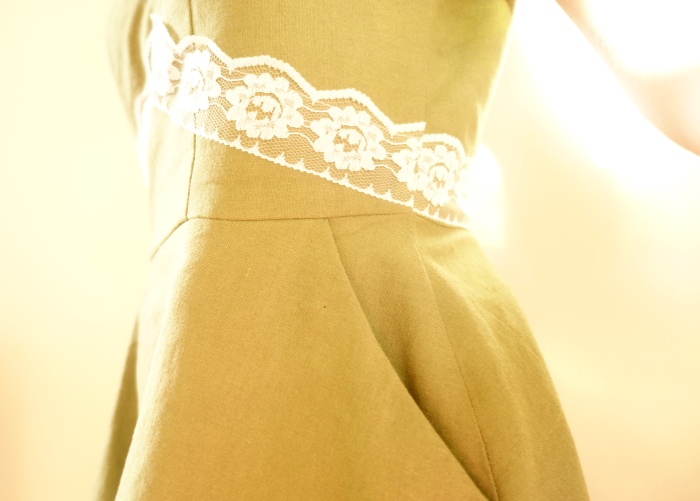
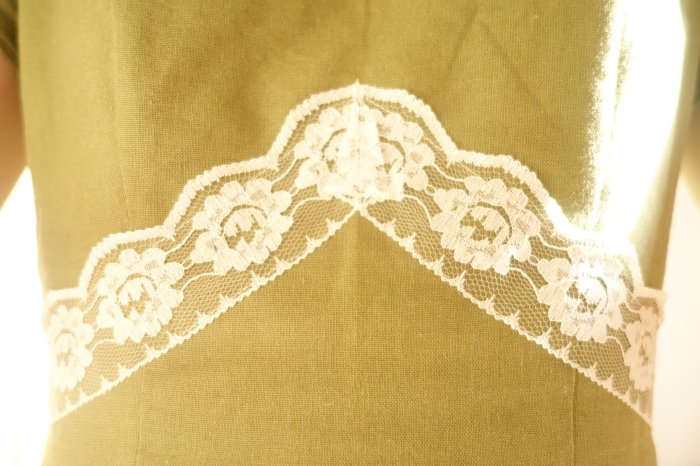
The lace is stitched on with a straight stitch. I used my rarely-useful flexible ruler to get symmetrical lines on the dress with chalk, well, symmetrical to the eye anyway, which is all they need to be. I don't know if they are perfectly perfect.
DSC06199DSC06202
I mentioned that I have been wearing this dress for about a week. This may seem odd for a graduation dress, and I do think the lace looks a bit "occasion wear", but I wanted to make a dress that I could wear again, and I think the dull khaki green colour permits this. I haven't room for clothes I can rarely wear, nor do I particularly want them.
So, I am very pleased with this dress, not least because I sewed it pinlessly in four hours (counting drafting and cutting) with almost no unpicking. It's like wearing a trophy. :)
Have you made a special occasion dress lately? Or have you been speed sewing and/or made something you're super please with? Do share in the comments below!

Labels: , , , ,

Monday 31 August 2015

Cut 21 -- Part 5 -- The Shirt

The shirt was the most difficult thing to make, mainly because of the plackets.
DSC05927DSC05928
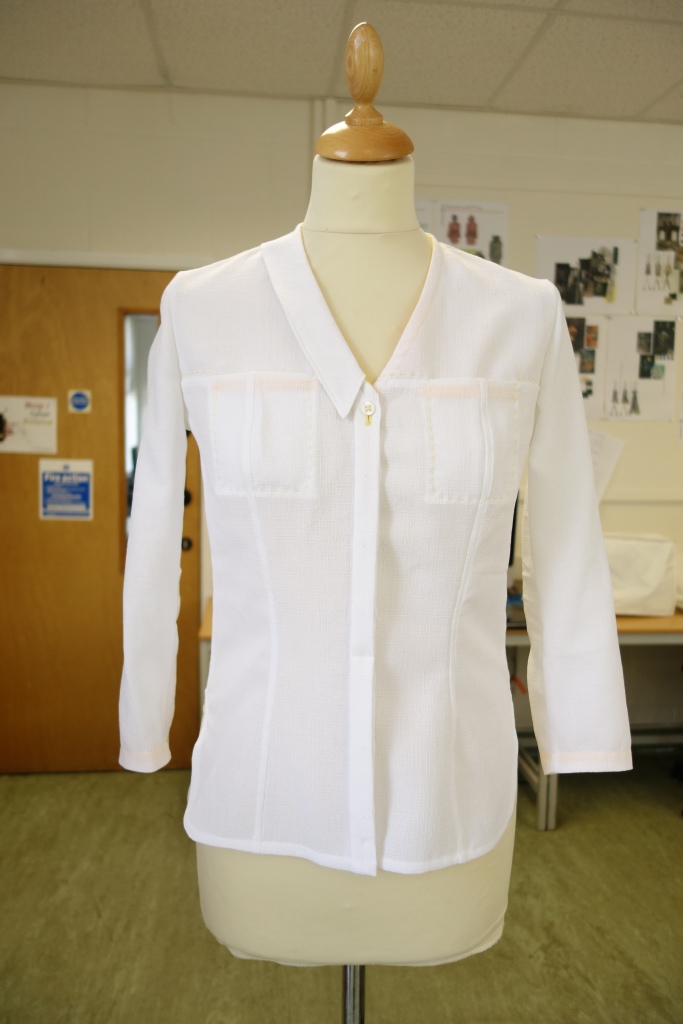
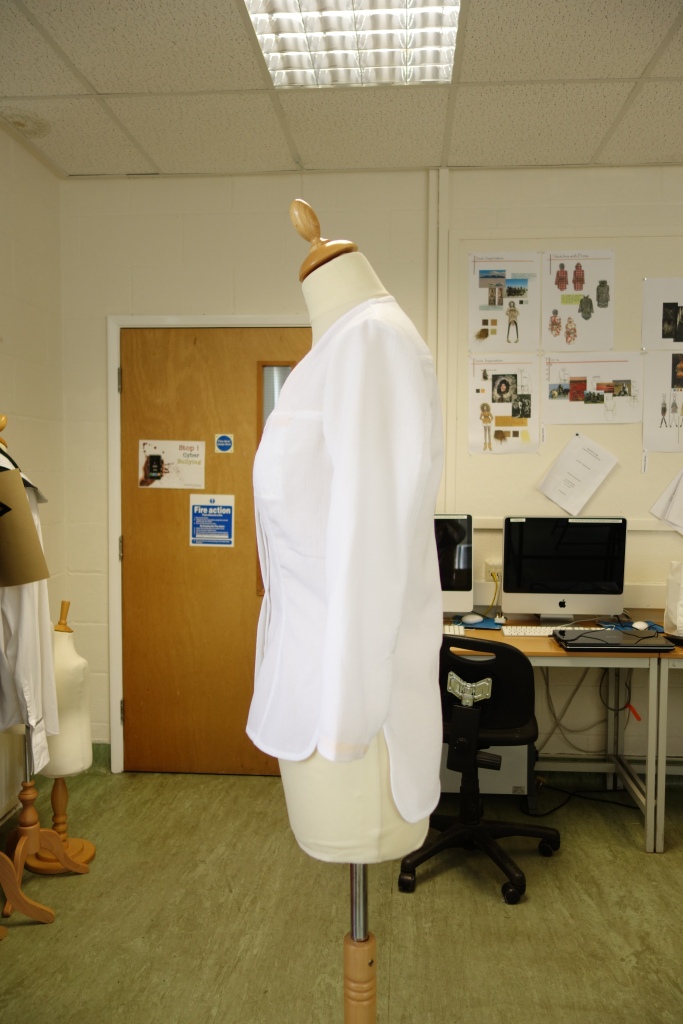
It is fitted at the front and dartless at the back (although the CB seam is shaped) to give an asymmetric modern, relaxed silhouette. The sleeves are three-quarter length so that you don't constantly have to roll them up, and you can see your watch.DSC05929Of course, the Cut21 shirt is neither going to be a weird, avant-garde shirt, nor a boring ordinary one. It is fairly subtle in style, but has a few unique features. In more detail:
DSC05902
The shadow pockets. Basically in-seam pockets, but sewn with a felled seam, a bound seam, and a French seam. Excessive? Perhaps, but definitely worth it because it looks so much nicer inside, and will withstand more washing.
DSC05904
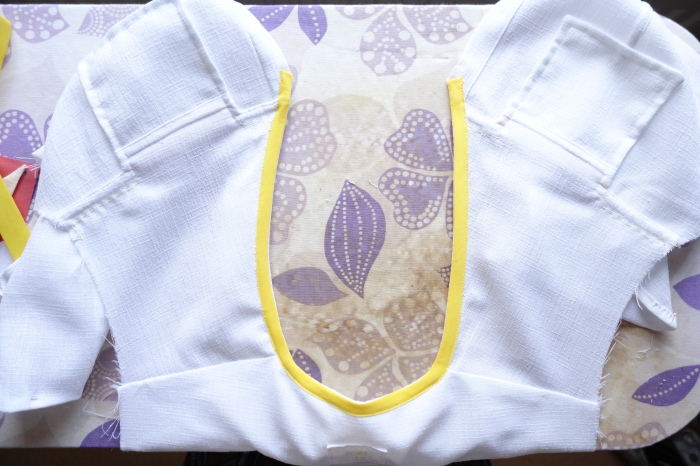
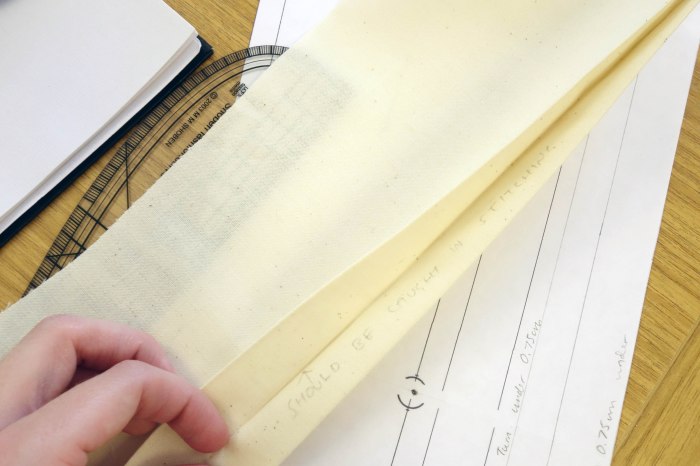
Bias-faced neckline. Because I used a partial, asymmetric collar and did not want to use a traditional facing, I faced the neckline with bias binding. The trickiest part was at the front because of the placket bulk. With a fair bit of force and pressing, it turned out acceptable.
DSC05926
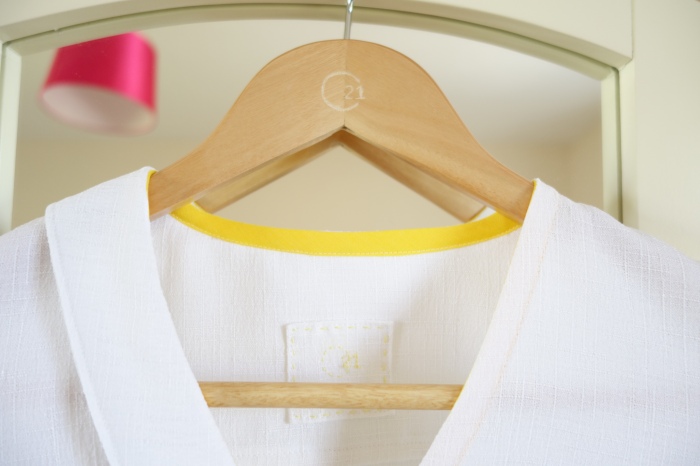
You can just see the hand-stitched label here on the inside of the yoke, and part of the collar. Also, notice the customised coat hanger! :D I carved the logo out with my craft knife. I'm pretty pleased with it, especially as I have not exactly got a lot of experience with woodwork.
DSC05908
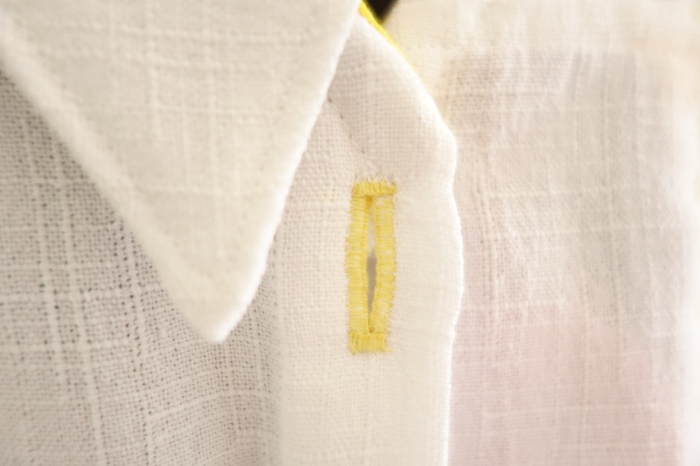
La pièce de résistance! My hand-stitched buttonhole! It took me at least 4 months to learn how to stitch this neatly, and then it took me about 45 mins to sew it (Savile Row tailors take 7 mins for some perspective). I used the straight-stitch buttonhole on my Bernina 380 to make the guide, and that made it easier to get the sides the same width all the way down, and I suppose it strengthened the buttonhole too.
DSC05919
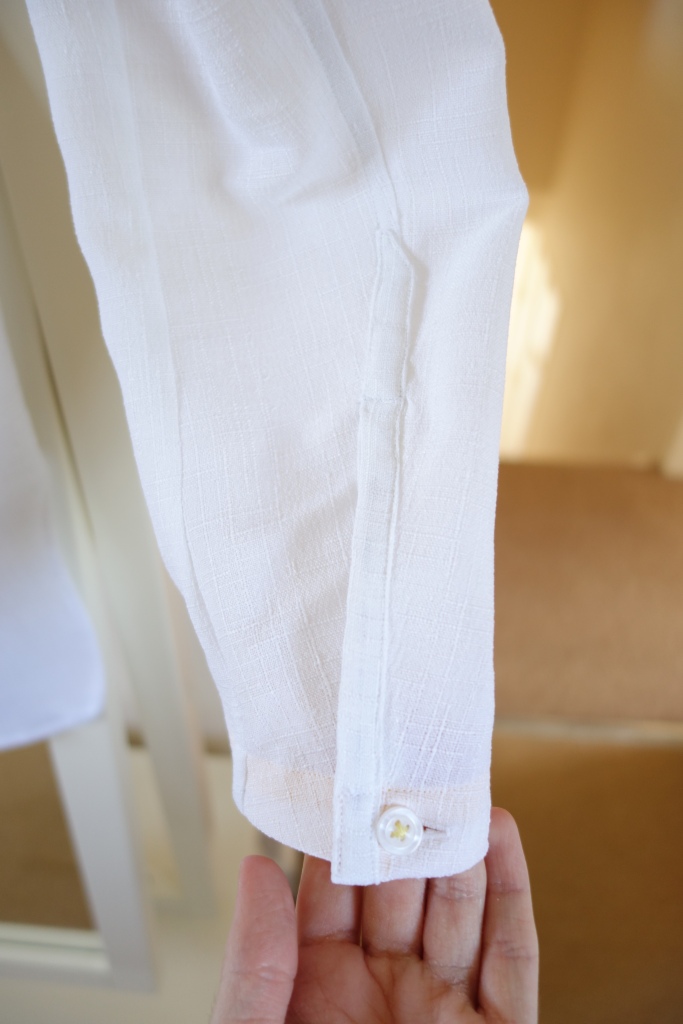
The placket. Now, admittedly, this is not as neat as I wanted it to be. This is partly because the fabric is quite springy. And it is a pretty tricky thing to sew in a fabric that frays like this. I had to recut a sleeve and start it again after a few goes at unpicking. That's how tricky it is. Would I do it again? Absolutely! You don't think I'll be beaten by fabric, do you? Anyway, I'm sure all it needs is practice. And pressing jigs, which I used (genius idea I got from Fashion Incubator). And hand-stitching. I admit, I had to hand-fell these down in some places (one mostly, and then machine top-stitched) just to be sure of catching the underside. I expect it would be easier in a shirting cotton like Oxford. It might also have helped if I had fused the placket pieces, and not stitched the placket on the bulky felled French seam. I very seldom make things easy for myself.
Also, the buttonholes were passable here. Passable. Not great, but not failures, exactly.
 
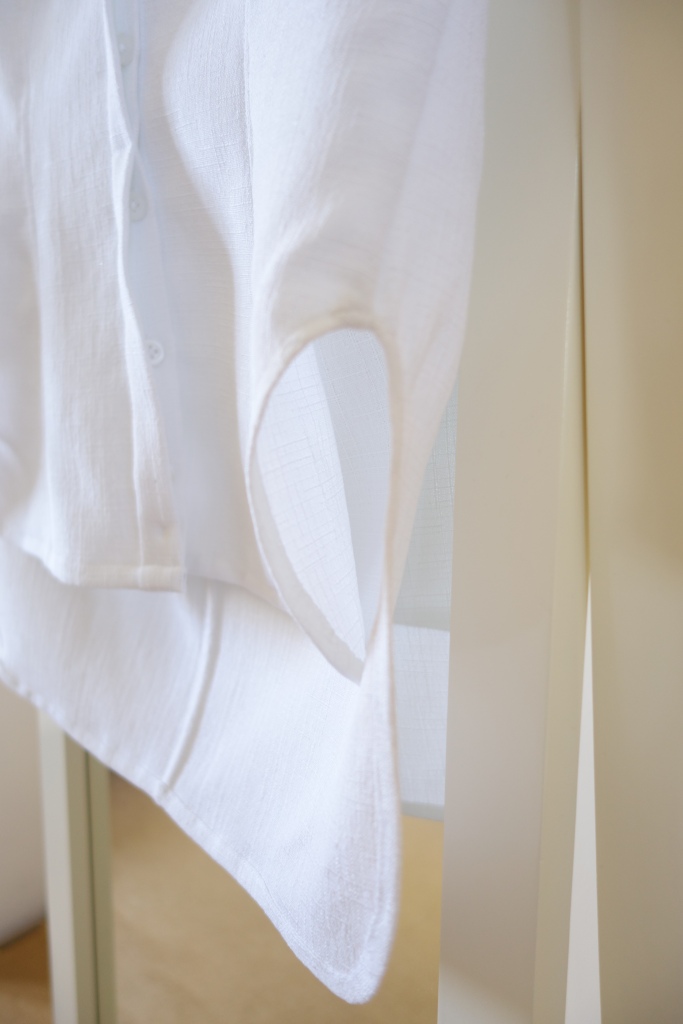
DSC05925The curved hem. This hem is specially designed, not just for looks, but so that you can sink your hands into your pockets without messing up the hang of your shirt. The hem allowance is not equal all the way around. This developed because the front needed extra turn-up for the bulk of the placket, and the concave curves at the side seams demanded a smaller turn up. As long as it's neat.
The back is longer than the front for asymmetry, and also it covers you when you're on your bike. No one wants builder's bum.
DSC05918
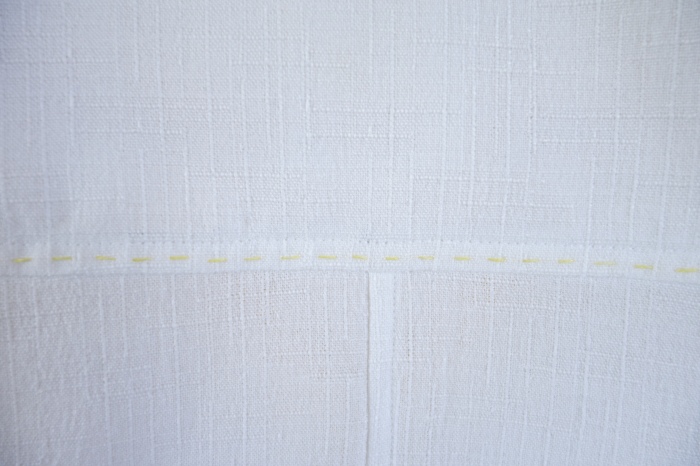
The hand-stitching on the yoke. I used the burrito technique to sew the yoke. Lovely clean finished insides! And to set it off, the hand-stitching. It's not much, but it makes a big difference.
DSC05871
The hidden-button placket. (toile shown with sewing error) This fits with the minimalism/modernism part of the concept. You can only see the top button and buttonhole. The hidden buttons are machine-stitched (as if I have time to hand-stitch -- what was it? -- 10 buttonholes!) There is a straight-stitch bar-tack at the waist level to keep the placket from gaping open and showing the buttons.
DSC05880
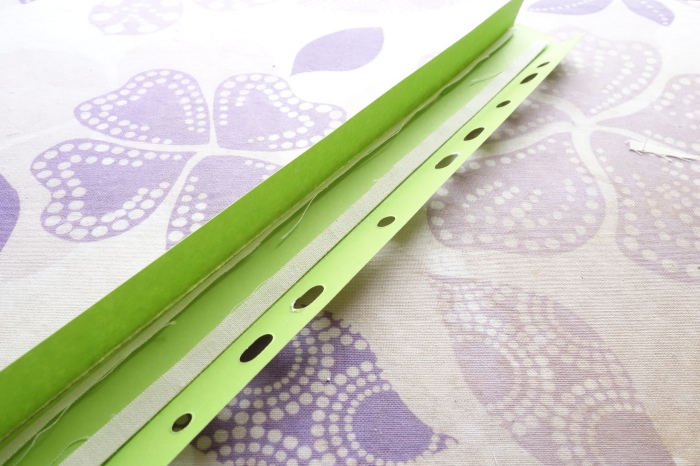
A pressing jig. As this is one of the most interesting parts of the project, in my eyes, I had to take a photograph and show you. It's basically two rectangles of card. The outer one has a space that is 2cm wide (BTW, a quick unpick makes an excellent scorer), while the inner one is just about 1.8cm wide to account for the thickness of the cloth and the folding of the card. If it were 2cm wide, you'd never get the outer one to close properly. The jig is made from a file divider.
The jig for the gauntlet is a separate one to the jig for the placket binding because they are different widths. It's a good idea to label the jigs and keep the pairs together.
I used different shaped jigs for the hems too. It's a habit I got into at Wayside Flower. We use it for pockets to make sure they are symmetrical and neat. (Neatness is our watchword).
The armscye seam is French seamed! I know! It's so rare that fabric will let you do that, but one nice thing I can say about this fabric (whatever it is -- bought it in Paris) is that it lets you French seam curves, even the very curvy armscyes and sleeve-heads I use. I am just so pleased with this! I didn't take a photo, but I don't really need to because you probably already know what a French seam looks like. :)
Another thing is that to get the nice point on the collar I used the shirtmaker's technique from Off the Cuff (it's farther down that page). This is a great technique -- it's almost like magic for getting nice corners!
Well, I think that will do for the shirt. I'm going to make a longer version with a simpler hem as my graduation dress, and in case the fabric is a little too see-through I've made some shorts (in 2 1/2 hours!) to wear underneath. If it is too see-through I'll make a camisole too.
Currently I am working on preparing the jacket pattern to add to my Craftsy store. Of course, I'll let you know when it's available. I'm thinking of doing two versions: on with seam allowances, and one without for more advanced stitchers who want to learn how to prepare seam allowances for proper production sewing on a simple machine (i.e. not on machines with all kinds of handy feet that do things automatically). They'll be the same price because it takes the same amount of work to make both -- one needs working out of seam allowances and their shapes, and one needs instructions.
Till next time,
Sabrina

Labels: , , ,