Cut 21 -- Part 5 -- The Shirt
The shirt was the most difficult thing to make, mainly because of the plackets.
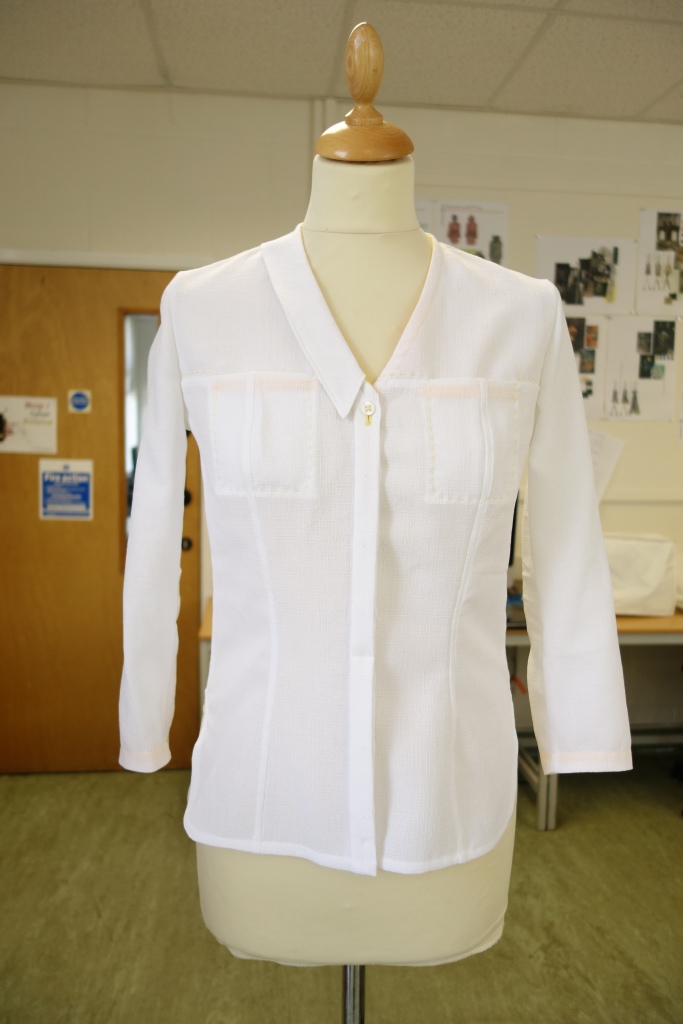
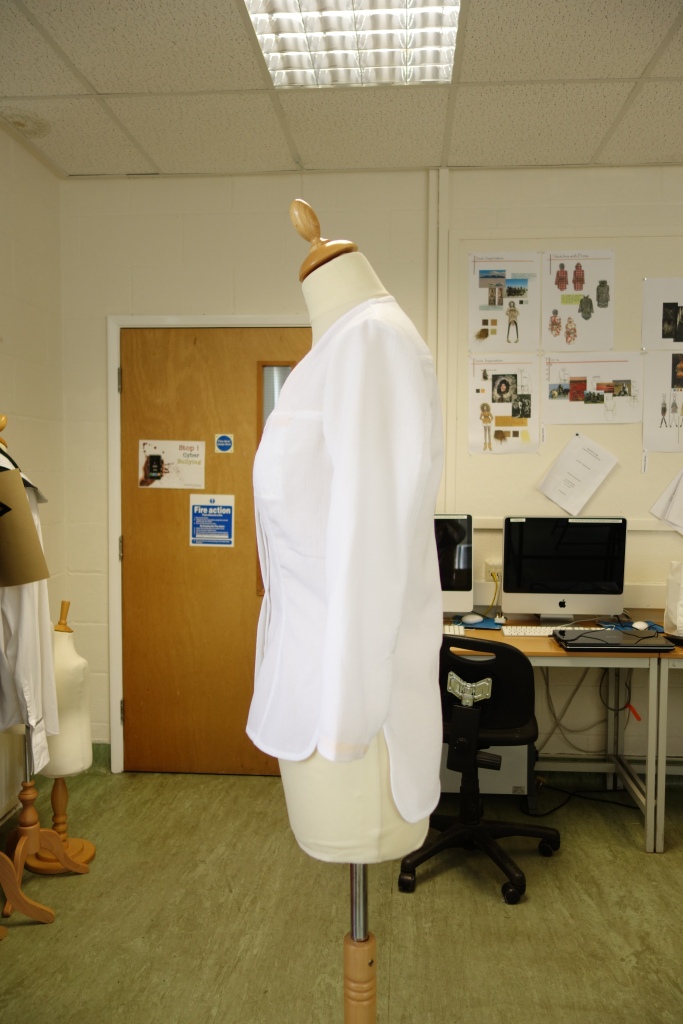
It is fitted at the front and dartless at the back (although the CB seam is shaped) to give an asymmetric modern, relaxed silhouette. The sleeves are three-quarter length so that you don't constantly have to roll them up, and you can see your watch.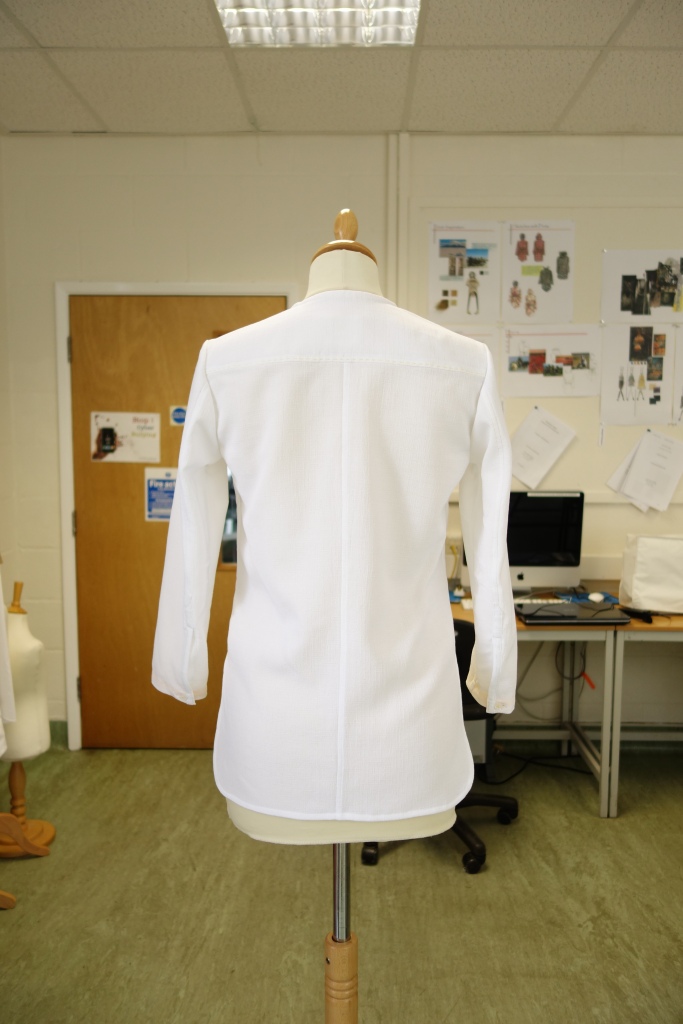 Of course, the Cut21 shirt is neither going to be a weird, avant-garde shirt, nor a boring ordinary one. It is fairly subtle in style, but has a few unique features. In more detail:
 Of course, the Cut21 shirt is neither going to be a weird, avant-garde shirt, nor a boring ordinary one. It is fairly subtle in style, but has a few unique features. In more detail:
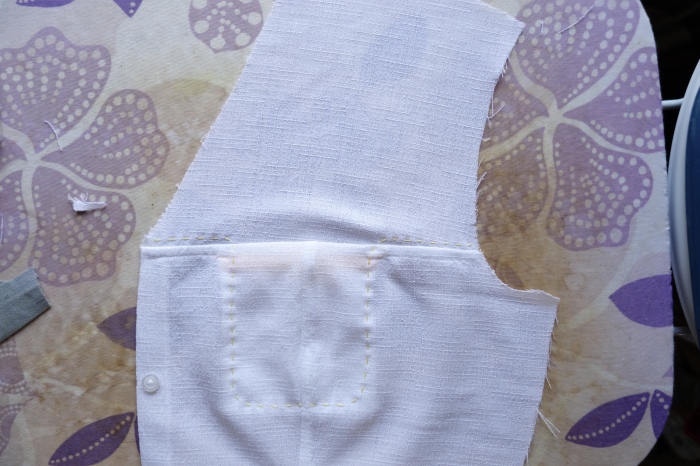
The shadow pockets. Basically in-seam pockets, but sewn with a felled seam, a bound seam, and a French seam. Excessive? Perhaps, but definitely worth it because it looks so much nicer inside, and will withstand more washing.
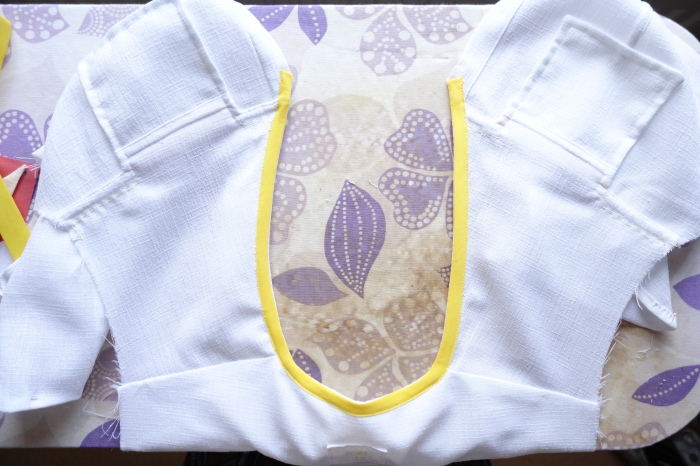
Bias-faced neckline. Because I used a partial, asymmetric collar and did not want to use a traditional facing, I faced the neckline with bias binding. The trickiest part was at the front because of the placket bulk. With a fair bit of force and pressing, it turned out acceptable.
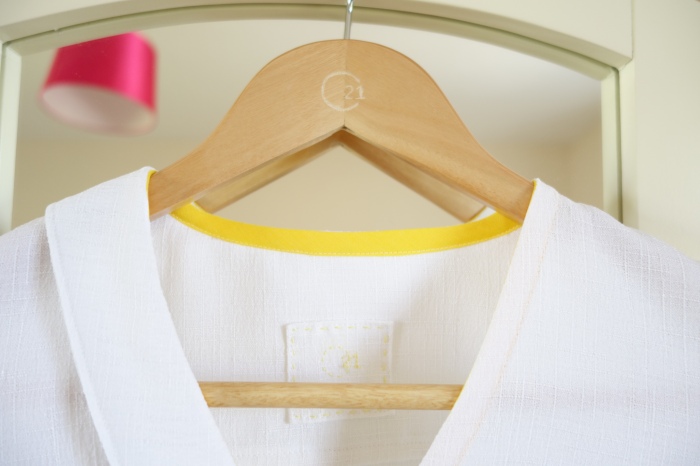
You can just see the hand-stitched label here on the inside of the yoke, and part of the collar. Also, notice the customised coat hanger! :D I carved the logo out with my craft knife. I'm pretty pleased with it, especially as I have not exactly got a lot of experience with woodwork.
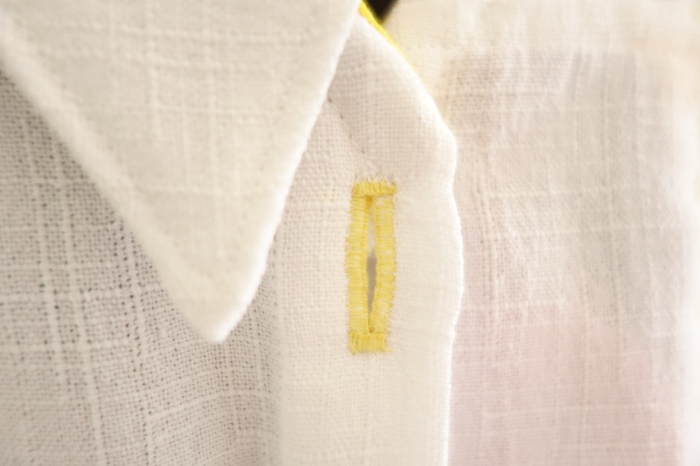
La pièce de résistance! My hand-stitched buttonhole! It took me at least 4 months to learn how to stitch this neatly, and then it took me about 45 mins to sew it (Savile Row tailors take 7 mins for some perspective). I used the straight-stitch buttonhole on my Bernina 380 to make the guide, and that made it easier to get the sides the same width all the way down, and I suppose it strengthened the buttonhole too.
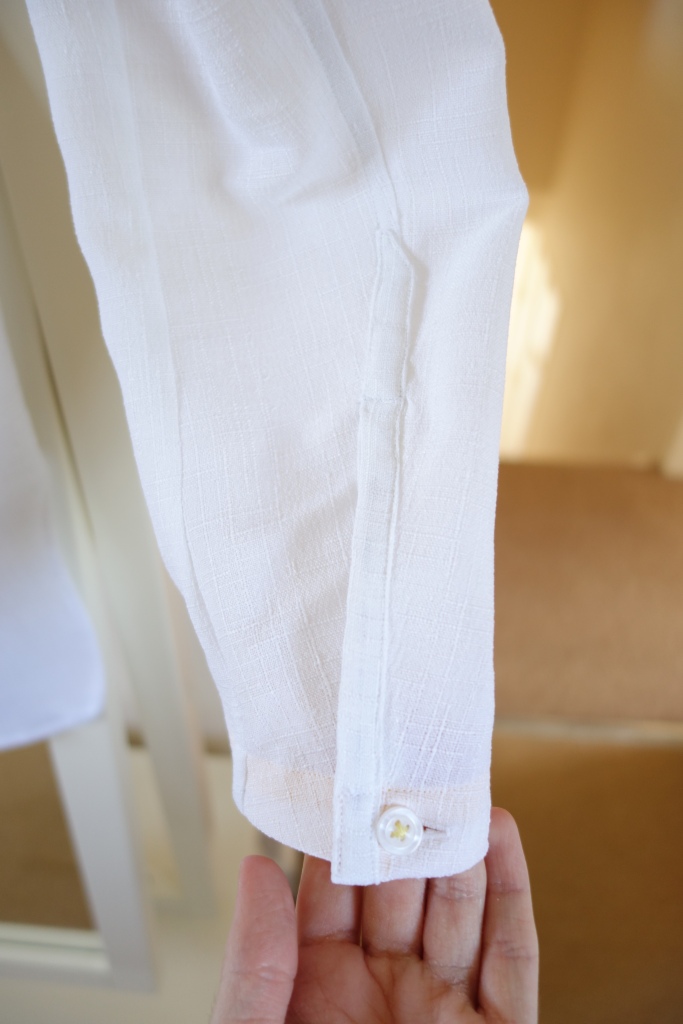
The placket. Now, admittedly, this is not as neat as I wanted it to be. This is partly because the fabric is quite springy. And it is a pretty tricky thing to sew in a fabric that frays like this. I had to recut a sleeve and start it again after a few goes at unpicking. That's how tricky it is. Would I do it again? Absolutely! You don't think I'll be beaten by fabric, do you? Anyway, I'm sure all it needs is practice. And pressing jigs, which I used (genius idea I got from Fashion Incubator). And hand-stitching. I admit, I had to hand-fell these down in some places (one mostly, and then machine top-stitched) just to be sure of catching the underside. I expect it would be easier in a shirting cotton like Oxford. It might also have helped if I had fused the placket pieces, and not stitched the placket on the bulky felled French seam. I very seldom make things easy for myself.
Also, the buttonholes were passable here. Passable. Not great, but not failures, exactly.
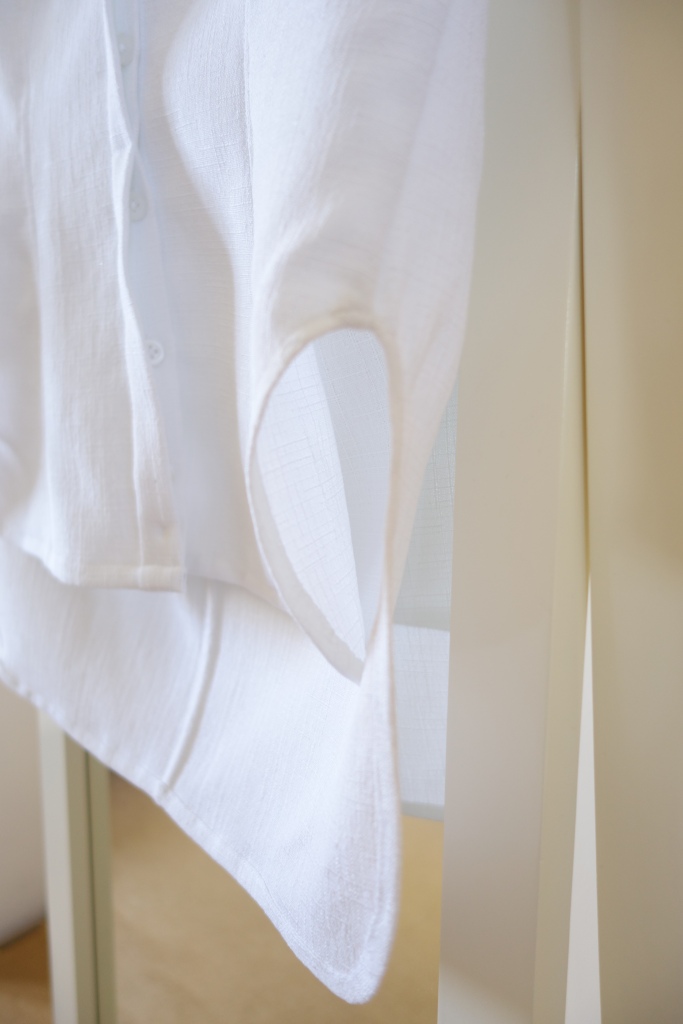 The curved hem. This hem is specially designed, not just for looks, but so that you can sink your hands into your pockets without messing up the hang of your shirt. The hem allowance is not equal all the way around. This developed because the front needed extra turn-up for the bulk of the placket, and the concave curves at the side seams demanded a smaller turn up. As long as it's neat.
The back is longer than the front for asymmetry, and also it covers you when you're on your bike. No one wants builder's bum.
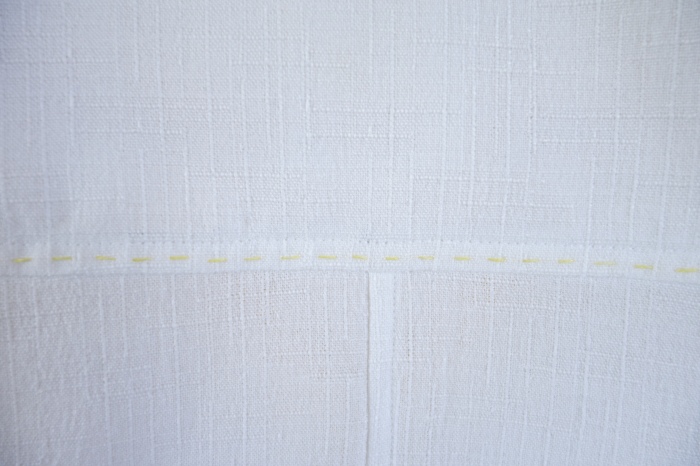
The hand-stitching on the yoke. I used the burrito technique to sew the yoke. Lovely clean finished insides! And to set it off, the hand-stitching. It's not much, but it makes a big difference.
The hidden-button placket. (toile shown with sewing error) This fits with the minimalism/modernism part of the concept. You can only see the top button and buttonhole. The hidden buttons are machine-stitched (as if I have time to hand-stitch -- what was it? -- 10 buttonholes!) There is a straight-stitch bar-tack at the waist level to keep the placket from gaping open and showing the buttons.
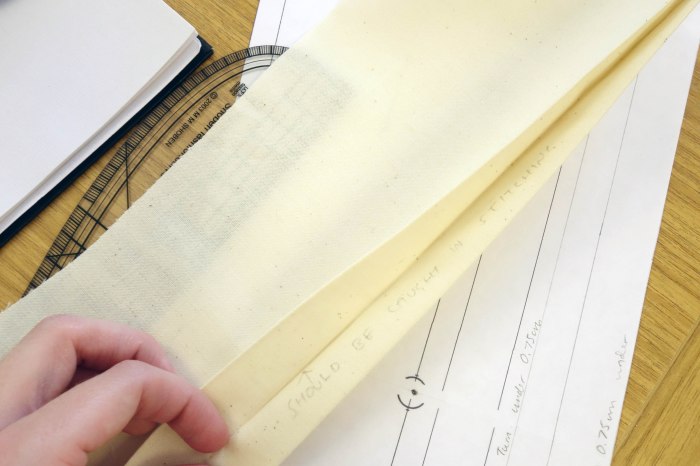
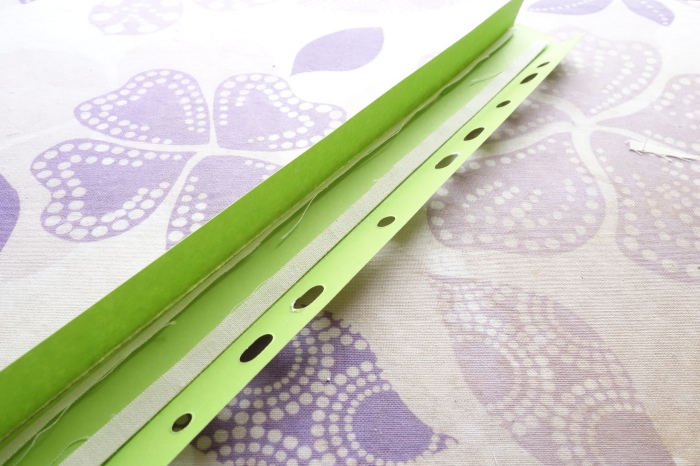
A pressing jig. As this is one of the most interesting parts of the project, in my eyes, I had to take a photograph and show you. It's basically two rectangles of card. The outer one has a space that is 2cm wide (BTW, a quick unpick makes an excellent scorer), while the inner one is just about 1.8cm wide to account for the thickness of the cloth and the folding of the card. If it were 2cm wide, you'd never get the outer one to close properly. The jig is made from a file divider.
The jig for the gauntlet is a separate one to the jig for the placket binding because they are different widths. It's a good idea to label the jigs and keep the pairs together.
I used different shaped jigs for the hems too. It's a habit I got into at Wayside Flower. We use it for pockets to make sure they are symmetrical and neat. (Neatness is our watchword).
The armscye seam is French seamed! I know! It's so rare that fabric will let you do that, but one nice thing I can say about this fabric (whatever it is -- bought it in Paris) is that it lets you French seam curves, even the very curvy armscyes and sleeve-heads I use. I am just so pleased with this! I didn't take a photo, but I don't really need to because you probably already know what a French seam looks like. :)
Another thing is that to get the nice point on the collar I used the shirtmaker's technique from Off the Cuff (it's farther down that page). This is a great technique -- it's almost like magic for getting nice corners!
Well, I think that will do for the shirt. I'm going to make a longer version with a simpler hem as my graduation dress, and in case the fabric is a little too see-through I've made some shorts (in 2 1/2 hours!) to wear underneath. If it is too see-through I'll make a camisole too.
Currently I am working on preparing the jacket pattern to add to my Craftsy store. Of course, I'll let you know when it's available. I'm thinking of doing two versions: on with seam allowances, and one without for more advanced stitchers who want to learn how to prepare seam allowances for proper production sewing on a simple machine (i.e. not on machines with all kinds of handy feet that do things automatically). They'll be the same price because it takes the same amount of work to make both -- one needs working out of seam allowances and their shapes, and one needs instructions.
Till next time,
Sabrina
Labels: Bishop Burton College, Cut21, FMP, Shirt


0 Comments:
Post a Comment
Subscribe to Post Comments [Atom]
<< Home