Tuesday 4 June 2019

Viking Dress in Jersey

As the Hobbit and LOTR are largely inspired by Nordic legends, I thought I'd put a Viking dress into my final collection. It's pretty much zero-waste too.


viking-dress-pattern

  • ribbing
  • overlock seams
  • overstitching
  • using clear elastic as a stabiliser on knits
  • marking jersey (use a marker pen). 
I haven't perfected the neckline though (and it bothers me).

I recently got an overlocker on eBay (Toyota SLR4D) and finally have it working properly (turns out the tension discs just needed wiping out)! And learning to work with jersey is one of my goals for my FMP, so I'm making this dress from either jersey or ponte knit (which I have to test sew because I haven't used it before and it's different).

This dress took me about 4 hours to make including cutting. I'm reasonably pleased with it and I will be wearing it, even though it's a size 10 and I'm a 6.

I suppose this answers how RTW fits pretty much everyone since jersey became the norm.

Now, you may have noticed that the sleeves are a little snug in comparison to the dress form. This is one of the reasons we toile. :) I have made them bigger on the pattern.

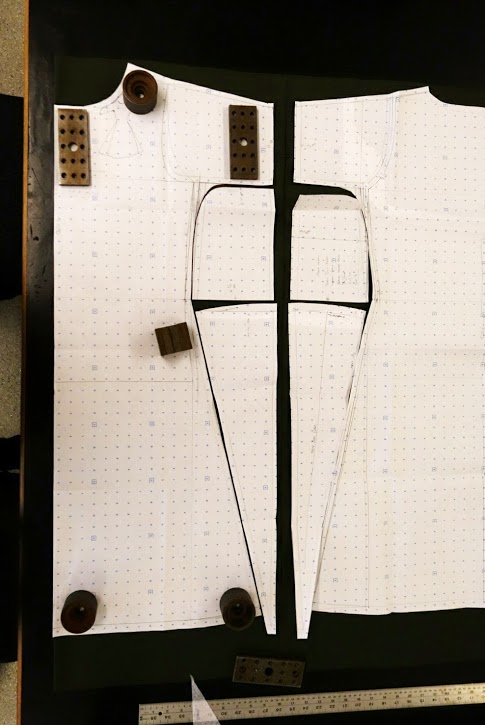
The pockets were going to be sleeve segments, but I thought pockets would be better (because who doesn't love pockets?!)

New skills used in this dress:

I got the fabric yesterday at The Shuttle in Leeds. I went on a fabric sourcing trip with the class, which was fruitful, though I still have a few more things to get, like sweatshirting and gold-coloured denim. I estimated my final collection will cost up to £300 in supplies. Not bad really, considering in London it's not unusual to pay £7,000 (but that includes paying people to make it for you, which we don't do).

I have updated the pattern to work with the changes in the sleeves, and will try it next in a t-shirt, perhaps with the lace at the shoulders too.

If you'd like more timely updates, don't forget to check out my Instagram!


Labels: , , , , ,

Thursday 28 July 2016

Summertime Shorts

We've been having a heatwave here in Britain, and I needed some more shorts. I had what I thought was a pretty good pattern, but measuring the waistline I wonder how on Earth I ever managed to zip my un-stretched shorts up! I must have made some colossal mistakes when measuring or something because I've had to increase the waist measurement considerably (and, no, I haven't got that much bigger -- as if I could gain weight!).

The inspiration for these shorts is a blend of Audrey Hepburn's shorts in Sabrina, and some shorts I have already designed and made. They are quite short, but not hot pants, and I've flared the legs a bit since toiling so they will hopefully be a bit more elegant.


Toiling


The initial fit (after adjusting the waist measurement on Illustrator) was pretty good. The waistband pokes out a bit at the front, but I think that's due to the fairly straight waistline on the front pieces. I've corrected that since. The waistline fits actually on my waistline all the way around. They're comfortable.

I did have a 1cm discrepancy on the inseam -- the back needed lengthening there, but now it matches the front. I think that may account for the funny fit on the toile.
I've since flared the back leg pieces so they don't cup the cheeks so. I was working off a photo of Audrey Hepburn:
Audrey Hepburn filming for the film 'Sabrina'
There seemed to be some variable camel toe on the front. It wasn't major and I wasn't sure what to do about it, so I've left it for now. We'll see if it disappears when I use proper fabric. :)

Making


Front of shorts. I will change the pattern so that the pockets start farther from the centre front.


Back. I love how neatly this invisible zip turned out!


That caterpillar thing you can see is the hand-stitched bar for the hook and bar fastening.


Hand chain-stitching along the front pockets


The gusset not only makes these shorts so much more comfortable for cycling,
but it improves the look of the fit too!


The cuffs. I pressed them, but they still need a little help to stay up neatly, so...


... I hand tacked them up at the front and back of each leg.


I was going to have the back pockets match, but I like the lining (Liberty cotton) 
so much that I have it on show! And I used a serpentine stitch along the tops
of the back pockets, just because it's pretty. :)


The hems. Overstitched, herringbone stitched, and topstitched about 3mm
from the cut edge. I will increase the hem allowance on the pattern. :)


Front view


Side view with pocket


Profile view. A somewhat more discreet fit than the toile, I think. 
And I'm glad they didn't turn out to be 'flared'. :)


I'm happy with that fit. One day I will master the back view shot.


Outfit shot. I love this sweater from The Sweater Shop in York, 
and my boots from TKMaxx! I'm not being paid to say that. Well, unless
The Sweater Shop sees my photo and gives me 10% off my next purchase :).


All in all, I LOVE these shorts! They’re so comfy! They fit just right too.

Sabrina


Labels: , , ,