Monday 31 August 2015

Cut 21 -- Part 5 -- The Shirt

The shirt was the most difficult thing to make, mainly because of the plackets.
DSC05927DSC05928
It is fitted at the front and dartless at the back (although the CB seam is shaped) to give an asymmetric modern, relaxed silhouette. The sleeves are three-quarter length so that you don't constantly have to roll them up, and you can see your watch.DSC05929
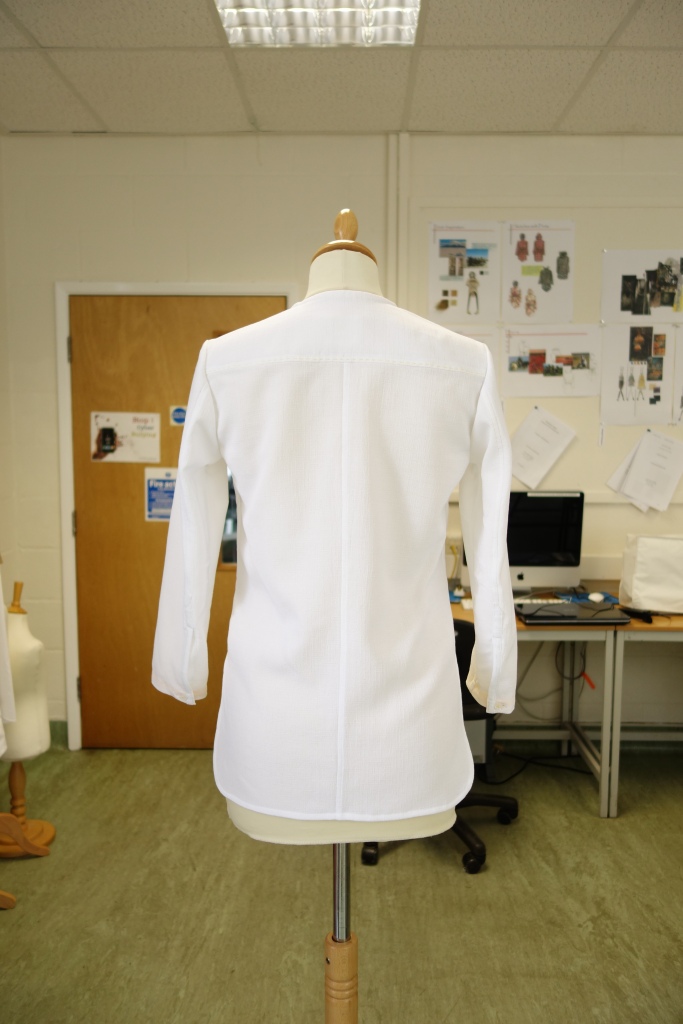
Of course, the Cut21 shirt is neither going to be a weird, avant-garde shirt, nor a boring ordinary one. It is fairly subtle in style, but has a few unique features. In more detail:
DSC05902
The shadow pockets. Basically in-seam pockets, but sewn with a felled seam, a bound seam, and a French seam. Excessive? Perhaps, but definitely worth it because it looks so much nicer inside, and will withstand more washing.
DSC05904
Bias-faced neckline. Because I used a partial, asymmetric collar and did not want to use a traditional facing, I faced the neckline with bias binding. The trickiest part was at the front because of the placket bulk. With a fair bit of force and pressing, it turned out acceptable.
DSC05926
You can just see the hand-stitched label here on the inside of the yoke, and part of the collar. Also, notice the customised coat hanger! :D I carved the logo out with my craft knife. I'm pretty pleased with it, especially as I have not exactly got a lot of experience with woodwork.
DSC05908
La pièce de résistance! My hand-stitched buttonhole! It took me at least 4 months to learn how to stitch this neatly, and then it took me about 45 mins to sew it (Savile Row tailors take 7 mins for some perspective). I used the straight-stitch buttonhole on my Bernina 380 to make the guide, and that made it easier to get the sides the same width all the way down, and I suppose it strengthened the buttonhole too.
DSC05919
The placket. Now, admittedly, this is not as neat as I wanted it to be. This is partly because the fabric is quite springy. And it is a pretty tricky thing to sew in a fabric that frays like this. I had to recut a sleeve and start it again after a few goes at unpicking. That's how tricky it is. Would I do it again? Absolutely! You don't think I'll be beaten by fabric, do you? Anyway, I'm sure all it needs is practice. And pressing jigs, which I used (genius idea I got from Fashion Incubator). And hand-stitching. I admit, I had to hand-fell these down in some places (one mostly, and then machine top-stitched) just to be sure of catching the underside. I expect it would be easier in a shirting cotton like Oxford. It might also have helped if I had fused the placket pieces, and not stitched the placket on the bulky felled French seam. I very seldom make things easy for myself.
Also, the buttonholes were passable here. Passable. Not great, but not failures, exactly.
 
DSC05925
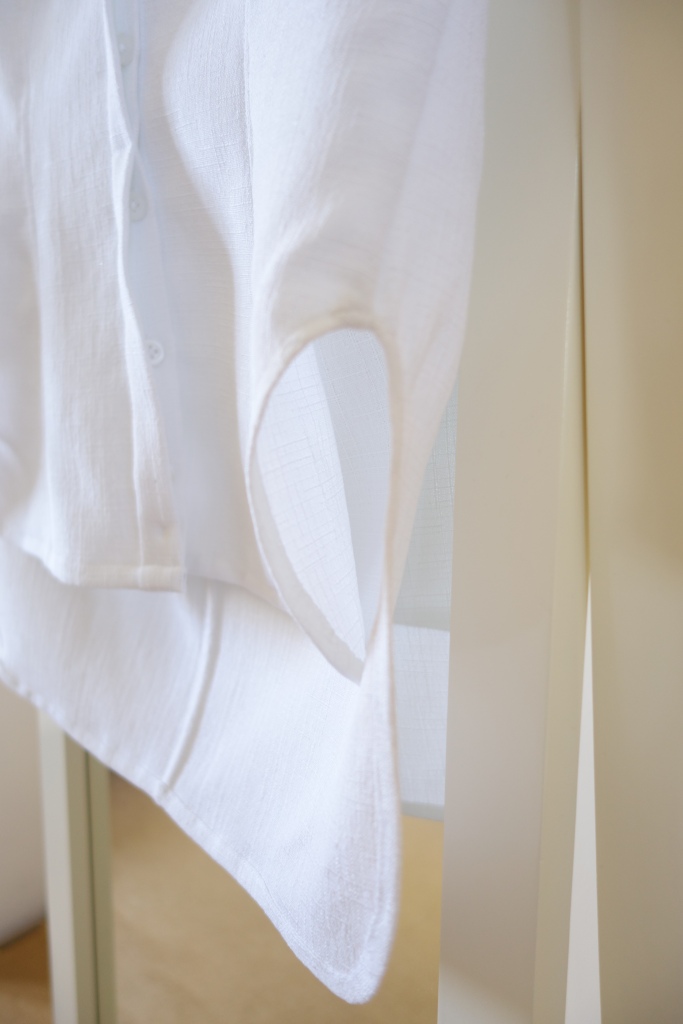
The curved hem. This hem is specially designed, not just for looks, but so that you can sink your hands into your pockets without messing up the hang of your shirt. The hem allowance is not equal all the way around. This developed because the front needed extra turn-up for the bulk of the placket, and the concave curves at the side seams demanded a smaller turn up. As long as it's neat.
The back is longer than the front for asymmetry, and also it covers you when you're on your bike. No one wants builder's bum.
DSC05918
The hand-stitching on the yoke. I used the burrito technique to sew the yoke. Lovely clean finished insides! And to set it off, the hand-stitching. It's not much, but it makes a big difference.
DSC05871
The hidden-button placket. (toile shown with sewing error) This fits with the minimalism/modernism part of the concept. You can only see the top button and buttonhole. The hidden buttons are machine-stitched (as if I have time to hand-stitch -- what was it? -- 10 buttonholes!) There is a straight-stitch bar-tack at the waist level to keep the placket from gaping open and showing the buttons.
DSC05880
A pressing jig. As this is one of the most interesting parts of the project, in my eyes, I had to take a photograph and show you. It's basically two rectangles of card. The outer one has a space that is 2cm wide (BTW, a quick unpick makes an excellent scorer), while the inner one is just about 1.8cm wide to account for the thickness of the cloth and the folding of the card. If it were 2cm wide, you'd never get the outer one to close properly. The jig is made from a file divider.
The jig for the gauntlet is a separate one to the jig for the placket binding because they are different widths. It's a good idea to label the jigs and keep the pairs together.
I used different shaped jigs for the hems too. It's a habit I got into at Wayside Flower. We use it for pockets to make sure they are symmetrical and neat. (Neatness is our watchword).
The armscye seam is French seamed! I know! It's so rare that fabric will let you do that, but one nice thing I can say about this fabric (whatever it is -- bought it in Paris) is that it lets you French seam curves, even the very curvy armscyes and sleeve-heads I use. I am just so pleased with this! I didn't take a photo, but I don't really need to because you probably already know what a French seam looks like. :)
Another thing is that to get the nice point on the collar I used the shirtmaker's technique from Off the Cuff (it's farther down that page). This is a great technique -- it's almost like magic for getting nice corners!
Well, I think that will do for the shirt. I'm going to make a longer version with a simpler hem as my graduation dress, and in case the fabric is a little too see-through I've made some shorts (in 2 1/2 hours!) to wear underneath. If it is too see-through I'll make a camisole too.
Currently I am working on preparing the jacket pattern to add to my Craftsy store. Of course, I'll let you know when it's available. I'm thinking of doing two versions: on with seam allowances, and one without for more advanced stitchers who want to learn how to prepare seam allowances for proper production sewing on a simple machine (i.e. not on machines with all kinds of handy feet that do things automatically). They'll be the same price because it takes the same amount of work to make both -- one needs working out of seam allowances and their shapes, and one needs instructions.
Till next time,
Sabrina

Labels: , , ,

Monday 24 August 2015

Cut21 -- Part 4 -- The Jeans

The second part of the outfit is the jeans. I knew I wanted to make some for my FMP, and to begin with, the designs were fairly mainstream, though better-fitting. As it goes with designing, the more I sketch, the sooner I come to a good idea. I came to these (note: these are my sketchbook pages, not my scruffy-book pages):
1718Some features I chose to include in the jeans were: a slightly lower front waist so it doesn't dig into you; a gusset between the legs to avoid the "slicer seam" problem; and purposes, a contoured waist-facing instead of a traditional straight-cut waistband, giving a better fit and less bulk, as well as cleaner lines for the aesthetic. I wanted slim-fit legs, turn-ups, and, eventually, a back yoke shaped like a traditional shirt hem, just because.
Now, had I been able to make them in my size, I would have had more freedom to finesse the fit. As it was, I was required to make them in a tall size 12 (probably a shop size 10), and had no one the right size and height to test them on. I tried the toile on myself and had to pin a considerable amount out a the waist and turn the hems up a lot more. (Images here to save data).
These are the jeans I finished with.
Cut21 Jeans - Front
Notice the high back and low front, for comfort and security while riding.
Cut21 Jeans - backGranted, they would look better on a person. :)
Here are some detail shots:
DSC05942
The pockets feature the soft selvedge of this non-selvedge 11oz denim.
DSC05945
Inside the back pocket
DSC05946
Crutch gusset to make cycling more comfortable.
The gusset was quite tricky to sew. I had to clip into the corners to be able to get past the crutch point. I would have used a curved gusset like Kathleen Fasenella, but I couldn't get the curved edges to be the same length as where they had to go on the jeans, so I used a diamond gusset instead. She does on her jeans anyway so it must be acceptable.
DSC05935
Hand-topstitching using waxed embroidery floss.
Even though I used hand-topstitching, there is a lot of machine top-stitching on these jeans too. It's virtually invisible as I used the right colour Gutermann Sew-all thread (I can't remember the number for sure, but I think it was 512). I tested a couple of thread colours and put the sample and notes in my pattern file. That must get some points. :)
DSC05939
No waistband -- just a waist facing with its lower edge bound. There is a hook and bar at the top too, instead of a button and buttonhole.
If/when I make another pair, I will sort out this zip issue. I will have to stop lower down (would be easier to get the right length to begin with now I've time) because this comes close to showing when the jeans are fastened.
The other issue here was that the facings are not level inside. I don't know why, because the toile seemed okay, and the pattern, I think, was correct (must check). I want to find out what caused this because it annoys me to have that fairly noticeable (when you are getting dressed) fault. >:|
And, yes. That wobbly navy stitching on the binding on the zip guard does bother me.
Anyway...
DSC05940
All the garments in my collection feature hand-embroidered labels. Including labels is sure to get me a few marks! :)
DSC05943
The yoke line, which you can only see by the Sashiko-inspired stitching, is meant to resemble a shirt hem. The lines of the pockets echo this. I used extra long belt-loops for looks. They are backed with yellow bias because I refuse to use an overlocker on Cut21 stuff.
The back pockets were cut on the cross (not the bias, the cross, in case you use the wrong term) to take advantage of the selvedge, so when they are worn there is a shading differences, annoyingly. You can see in the photo that the grain doesn't match.
DSC05947
So much binding!
DSC05948
Side seams are bound to suggest the look of selvedge jeans. I tried opening the seams and binding separately, but it looked too sporty so I chose this option.
One thing I learned when doing all this binding is that it is much easier to sew on in one go if you press it in half first, perhaps with a little bit extra showing on the underside, just to make sure it gets caught in the stitching. If you have a really good binder attachment then maybe you won't need to do this, but I don't have one.
So these are the Cut21 Jeans. I would give them about an 8 out of 10, taking design into consideration, and the neatness inside. Plus the fabric is really nice! :)
Next week, you will see the shirt in more detail.
Sabrina
P.S. Sorry for posting late this week, I was doing a trial but I'm evidently too slow to work in an alterations shop.

Labels: , , , , , ,

Monday 17 August 2015

Cut21 -- Part 3 -- The Jacket

Okay, now I'll get onto the jacket. It's an open jacket so it has not fastening. It's meant to be simple in style, which is why there is no closing. That's a feature I might change if I ever made it again.
A sketchbook page featuring the jacket
Just because it's a simple style and has no closing, it doesn't mean to say that it was easy as pie to make. It's unlined (a lining would have made it easier in some ways) but as I refused to use a zigzag stitch or overlocker on this project, all of the seams had to be felled or bound, but the main two challenges were the pockets and facings. Cut21 Jacket Pocket ToileAs you can see, this was very fiddly to bind. This was an issue that had to be amended. I did this by introducing a full-length Princess seam at the front and sewing the front edge of the pocket into that. I also changed the shape of the other side of the pocket so that it had a much less acute angle to bind, a curve. Inside the jacketIn this photo you can see the side seam, the side of the pocket, and the back peplum seam. The hardest part was going over the bulky cross seams. You have to use some finger skills here, and a humper-jumper helps. The hem was originally going to be a simple double-turn hem, but that didn't work with the steep curve at the back. So I decided to use a bias facing.
There was the conundrum of what to do about the part where the hem goes into the facing seam -- how to sew it neatly by machine? The solution was to leave the facing topstitching undone at the bottom at first, tuck the bias into it, then TS it down, being careful to match up the TS lines as discreetly as possible.
DSC05657
So this is the final jacket (I must sort out a nice backdrop for photography):
Cut21 Jacket FrontCut21 Jacket Back
The back swoops down to cover you while you're riding a bike.
And a couple of detail shots:Cut21 Jacket Stitching DetailCut21 Jacket Pocket Detail
Cut21 Jacket Armscye binding
The armscyes are bound. The stitching at the top of this one is not perfect and now it's really bothering me. I won't be letting that happen again.
Binding, facing, felled seams and front TS -- all in one shot :)
I hope you like it! It was actually the easiest part of the collection to make and took about two days, if memory serves. After I had made a few, I expect one day would suffice, especially as I wouldn't be taking photos during the process.
Sabrina

Labels: , , , , ,

Monday 10 August 2015

Cut21 -- Part 2 -- Concept and Consumer

I know I said I'd do the jacket post first, but then I remembered that I have a some work to show you first.

Consumer

Those among you who are fashion students or professionals will know that we have to have a consumer pinpointed. If no one wants to wear our product then there's no point in making it. We make a consumer board and profile.
Consumer Board
Consumer Board

Consumer Profile

If I have done it right, you should be able to get a good idea of who my consumer is and what she likes by looking at the board above. Now, I am aware that I ought not to have labeled it "consumer board"; I did it because I wanted it to be quite clear that it is not a mood board, and that is hard to tell with your own work because you see it differently.
Name: Lily James (I just realised that they are Harry Potter's parent's names)
Age: 27
Profession: Minimalist Photographer
Lives in: London, but travels
My consumer is a minimalist who lives in the City so she gets around by bicycle. This has been taken into consideration with the features of the designs.
If I tell you any more than that it might affect my originality rating on my submitted work, so I'll leave it there until I get my grades. :)

Fabrics and Colours

making close-up
Fabrics Board (Please forgive the blurry image; it was taken on my phone on the last day of college.)
Above is my fabrics board. I think it's my best yet. It's definitely different from the others. Somehow the hand-writing doesn't have the effect I wanted it to (hand-work against neatness); it just looks a bit unprofessional. The fabrics are stitched on. Thankfully excessive neatness was not required for my concept. :)
As you may see, all the fabrics have texture to them, and some are hand-loom. Those that aren't are from France.

We went to Paris to get our fabrics

It is the best place to get fabrics and notions! They had a whole section of a wall just for buckles and buttons! In England I am lucky to find three different buckles in a shop. I think we have the edge on customer service though. Maybe it's a cultural difference and I'm just not use to the French ways, but I found some of the sales assistants unhelpful and rude. Only some of them though. There were, of course, some very nice ones. The waiters in the restaurants and cafés are delightfully cheerful there. :)
The fabric shopping is incredible! You can find almost anything! It was so good that some of us were talking of relocating after college! :)
Charlie got her black denim there. She had tried and tried to get it in England to no avail and was so excited to get her lovely black denim. She also got some burnt orange linen for her shirt.
Alice found "the button" that inspired her collection's final designs, and fabrics to go with it. (Imagine how excited she was when we found an exhibition will over 900 different buttons!)
I got my shirting, linen, and bias binding. If I remember correctly, it totted up to about €75. The shirting is unfortunately polyester, but it was the closest thing I could find to what I wanted. I had planned to use Khadi Cotton but it was too similar to the linen I got for the jacket. I wanted a heavier weight for the jacket, nothing affordable was quite right. So I worked with what I could get. (I said you could find almost anything.)
The denim I got was 11oz Indigo denim from Merchant and Mills. It's so nice to work with! It's soft, it eases round curves for felled seams, and it's a good weight for jeans. It's just so nice! Especially after working with calico.
Next we'll get onto the jacket. :)
Sabrina

Labels: , ,