How to Make a Dress Part 12: How to Make and Insert the Inset and Hem the Dress
This is the last post in this series. All that is left now is to make and insert the inset and to hem the dress.
How to Make the Inset
Get your two inset pieces and put them RS together. Sew along the top edge (in this case the one with the slightly concave curve). Press flat then open.
The piece without the interfacing is the facing in this case. (For blouse fronts etc. the interfacing goes on the facing.)
Clip into the seam allowances. Press the seam allowances to the facing side (the one without interfacing).
Sew the seam allowances to the facing. This is called machine understitching.
Fold the pieces into the finished position (see below).
This is what it looks like facing side up.
And this is what it looks like front side up.
I haven't done so in this photo, but it helps with the next step if you baste the layers of the inset together.
Also, you should zigzag the raw edges to stop them from fraying.
How to insert the inset
This is where it gets tricky.
Pin the inset in place by lifting the collar up as in this photo and pinning through all the layers.
Now firmly baste in place by hand with cross stitches and then stitch one side by machine under the collar so that it's inconspicuous. If you think the inset is in place, repeat for the other side.
Note: You won't be able to stitch all the way down, so just go as far as your judgement suggests.
How to Hem the Dress
This dress has a 3cm (1 1/4") hem allowance. I pinned the hem level.
Clip into the seam allowances at the hem level to give a better edge.
When you have pinned all around, turn up the hem so that the pins are right on the edge. Then, holding the fold in place, remove the pin and pin the hem allowance down.
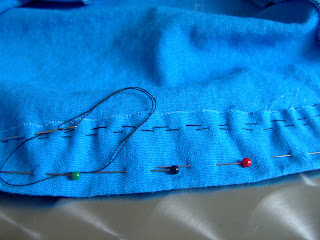
Now hand sew running stitches in the hem allowance only, and pull so that the hem allowance lies flush with the dress.
Baste the hem allowance to the dress.
This is what I call a hand coverstitch. It's basically an overcasting stitch where you catch one thread of the dress. Then you just repeat all the way around. If you need to start a new thread, secure both your old thread and your new one on the hem allowance.
Press.
Congratulations! Your dress is finished!
Until next time, happy sewing and Merry Christmas!
Sabrina Wharton-Brown
The Sewing Corner, 41 Market Place, Hornsea, HU18 1AP, UK
Labels: How to Make a Dress


1 Comments:
Learn the basics of sewing and the technicalities of it. Sewing is not just putting things together with the use of a needle and a machine. It is an art. You have to study every terminology and techniques used in this craft to be able to make different kinds of clothes in the future.
Post a Comment
Subscribe to Post Comments [Atom]
<< Home