
My 4-hour Graduation Dress
Now, as I mentioned in the previous post, there was some drama (by my standards) when it came to what I would wear for my graduation, namely, I changed my mind last minute and whipped up a dress in four hours (and very pleased with that am I too!)
To recap, the original plan had been to make a Cut21 shirt in my size, but lengthen it to make it a dress, and wear a matching camisole and shorts to prevent see-through, thereby avoiding the vintage dress look. Yes, I know vintage dresses are still quite big up here, but I tell you, they're on their way out, at least with so literal an interpretation. Something more industrial, more utilitarian is coming. It's already visible in some places and it won't take that long to seep into the mainstream. But I digress.
This is my dress:

Now, as mentioned in the photograph, there are several features of this dress with which I am quite pleased. What is not mentioned in the photograph (because I didn't want to clutter it up with text) is that I didn't use a single pin to sew it. Not one. I am super pleased with that. (I think I mentioned so last post.)
The fit is wonderful because I made it from my own block which has taken months to get right, and still may have a few tiny niggles to work out. The princess seams are contoured, the darting is balanced for my figure, not some fictional one in a pattern book, and it skims the figure, rather than hugging it (which is especially nice in this hot weather). As Edith Head said: "Your dress should be tight enough to show you are a woman, but loose enough to show you are a lady." For those who think Aldrich's block has too much ease, this is the fit you end up with it you use her Close-fitting Dress Block, shape the seams, and work out the darting so that you have 6cm waist ease. There is about 5cm of ease at the bust, but not at the armscye level, because the armscye level is higher than the bust. So when you draft the block with 10cm total ease, remember that that is not the final bust ease. You've got to shape the pattern's figure yet.
To get the flare in the skirt I swung out the darts (now you can see where the front darts were because they have left two great big triangular pleat-like flares where they use to be) and then still had to add some more flare. (I think this is a clue as to how to draft a cowl neck that stays as you want it to, but that's another story...) This is the minimum I would want for a flared dress, but I will admit that it means you sometimes have to be careful on a bicycle in the wind.
It is practically compulsory for my projects to have pockets. I like to sink my hands into them, so nice deep ones are good. They are, of course, also very handy for putting things in. At my graduation I had my bottle of water in one pocket and my camera in the other. You should have seen Alice's face when I showed her! I had my gown over it all so it didn't show, and it saved carrying a bag (I don't bother with clutch bags because the whole point of a bag is that it carry's stuff so you don't have to).
There is very little ease in the sleeve caps. I tried sewing the first one like a shirt sleeve, but it didn't work out very neatly (it's the thing that bothers me most about this dress). So for the second one I crowded the ease in as I learned in Sandra Betzina's Power Sewing book (which I gave to the college because, while there is good information in it, it is still home-sewing level, and I want RTW methods). Then I sewed it in shirt-sleeve style, matching up the top notch with the shoulder seam and spreading the eased cap over the armscye. No pins. :D
The hems of the sleeves are 0.5cm, 0.5cm double turn, single-stitch. The dress hem is 1cm, 1cm, double-turn, single-stitch. The measurements are by eye, so I think the dress hem is actually more like 1.2cm, 1.2cm, but that's just a matter of practice. It seems to have roped a bit, so next time I do such a curved hem, I'll do a narrower allowance. I had planned to, but sewing late at night, mistakes get made.
Which leads me to the zip. An invisible zip because I had only drafted a 1cm seam allowance with symmetrical backs. I used the method I learned on Fashion Incubator. Why don't all sewing instructions use this? It's so easy and gets a professional result! It's way better than the home-sewing ways you find in books and commercial patterns. I just don't understand it. Anyway, the mistake I made was that I sewed one end of the facing on with the rest of the facing twisted so I had to unpick it. Simple, but bothersome. I'll put it down to late night sewing (a very handy excuse).
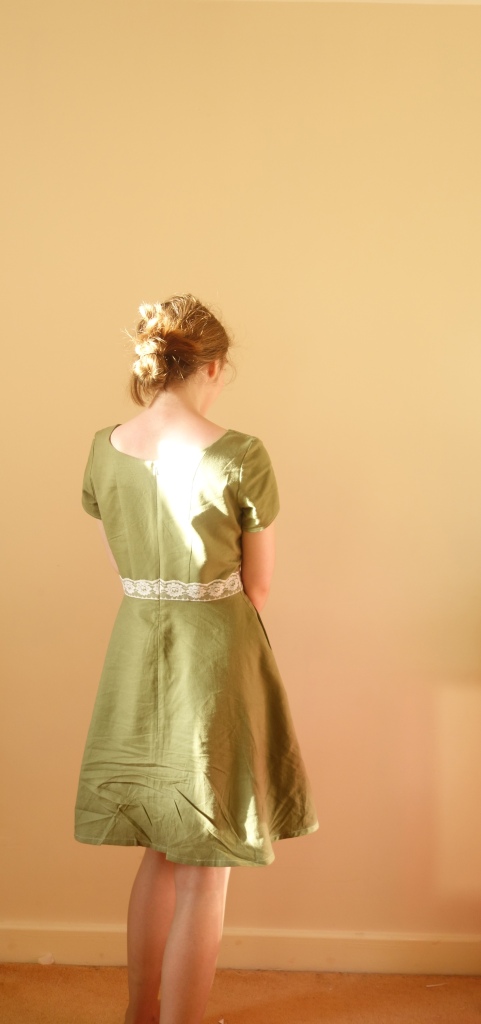
- BACK VIEW
Please ignore the creases; I have been wearing this dress for about a week.

Because of the wider neckline, a lower back neck works well. The zip is just at the right level that I can fasten it in one go, without having to reach over my shoulder.
The lace is stitched on with a straight stitch. I used my rarely-useful flexible ruler to get symmetrical lines on the dress with chalk, well, symmetrical to the eye anyway, which is all they need to be. I don't know if they are perfectly perfect.


I mentioned that I have been wearing this dress for about a week. This may seem odd for a graduation dress, and I do think the lace looks a bit "occasion wear", but I wanted to make a dress that I could wear again, and I think the dull khaki green colour permits this. I haven't room for clothes I can rarely wear, nor do I particularly want them.
So, I am very pleased with this dress, not least because I sewed it pinlessly in four hours (counting drafting and cutting) with almost no unpicking. It's like wearing a trophy. :)
Have you made a special occasion dress lately? Or have you been speed sewing and/or made something you're super please with? Do share in the comments below!
Labels: 4-hour dress, dress, Metric Pattern Cutting, pattern cutting, patternmaking
posted by SWB @ September 07, 2015
0 Comments
![]()
![]()


