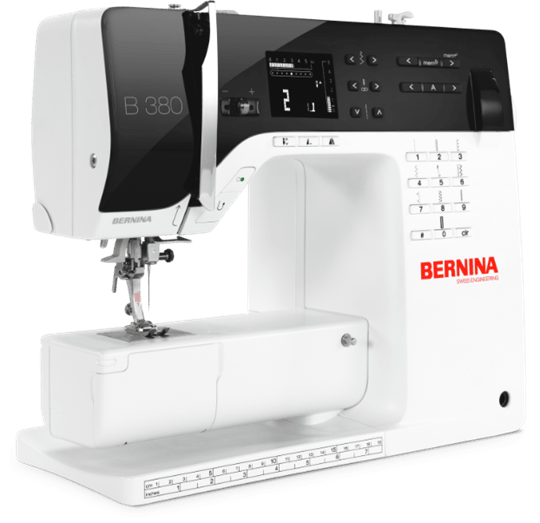
[Image from www.berninausa.com]
It was a bumpy ride getting used to my new machine. Apparently Berninas take a bit of getting used to. The top-stitching is generally superb and there are so many lovely decorative stitches! I love the Bernina feet and the shop (on-line, ordered by phone) was good enough to throw in the Manual Buttonhole foot 3 for free and the compensation plates for half-price!
The trouble was with the buttonholes. I somehow (perhaps unreasonably) expected the machine to make perfect buttonholes while I sat back and watched, not even holding the fabric or taking care sewing. Of course this does not work and left me wanting to return the machine.
The other issue, which I soon resolved, was a buzzing noise that started as soon as I switched the machine on. It turned out that the person who checked the machine, either at the shop or at the factory, had left the bobbin winder on. When I turned that off, the buzzing stopped and it's fine now, even when I wind a bobbin. (The bobbin winder is really great by the way: it's easy to use and stops itself when the bobbin is full!)
So I emailed the shop about it and she helped me. I think there must be a universal law that the minute one complains about something officially, the problem corrects itself. That is what happened here. I sewed with care and attention and perfectly fine buttonholes appeared. 8-|
So now I am quite delighted with my machine. It does such lovely scallop-stitching.
The Machine
It is bigger than I thought it would be, but somehow looks smaller in its cover. I thought I would have preferred it in silver, but the black actually doesn't bother me.
On of the first things that struck me was has small the stitch plate is. Here it is next to a spool of Gutermann thread for comparison:
See, it's tiny!
Feet
Waking Foot
And the feet are smaller than they look in videos. Here's the walking foot, which I thought would be big:
[Here you can see how well the walking foot kept the plaid matched up,
even without my forked pins, as long as I kept it matched up as I guided the fabric.
Note: this is not a welt seam, I just had a tiny seam allowance on one side.]
The feet of the walking foot are not toothy like the feed dogs; their sort of rubbery. I wonder how one could keep them fluff-free?
It comes with three soles: one for general sewing (already attached), one for quilting, and one for blind-hemming. It also comes with two stitching guides (a left one and right one) for parallel quilted lines. They attach with a little doohickey that's in the box.
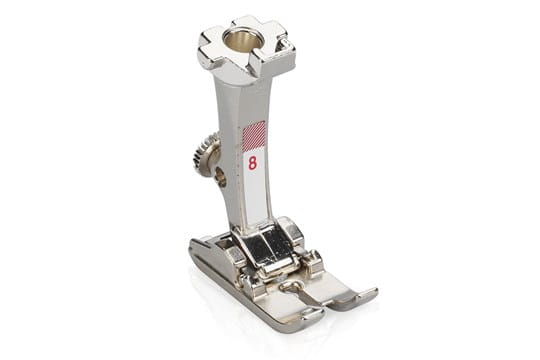
Jeans foot #8
[Bernina Jeans Foot #8. Image from berninausa.com]
This is good for any straight stitching. The outer edge gives you a seam guide of 7mm from the centre needle position, but you can move the needle over 1 notch for a slightly bigger or smaller seam allowance. The notch on front of the foot gives a 1/8" seam guide which is good for tiny seams, and the inside of the toe gives you a tiny-width guide (probably 1/16" but I haven't measured) for tiny, tiny pin tucks and edge-stitching.
I think it's sold as being good for going over thick seams, but I prefer foot #1 for that, which is the same width, but less (and I use the word hesitantly) bulky than foot #8 and has a wide needle hole for wider stitches.
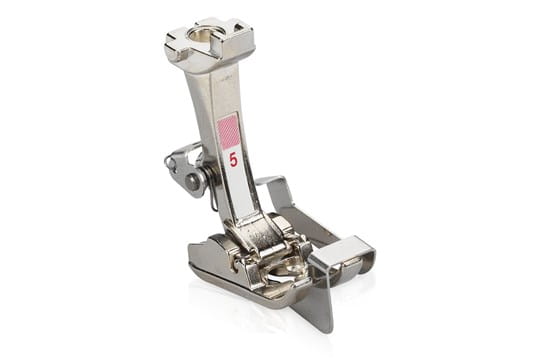
Blind-hem foot #5
[Bernina Blind-hem foot #5. Photo from berninausa.com]
The blind hem on my new Bernina B380 is the best I have ever done on a machine! It only take a tiny amount of the outer fabric, and would probably be nearly invisible if I used the right colour thread (instead of just what was handy) and loosened the upper tension a notch.
This foot is also excellent for top-stitching and edge-stitching. You can even use it over humps. It is different to edge-stitching foot #10 (not included) in that #10 doesn't have the metal bit in the needle area and so is probably better of stitching-in-the-ditch, but Sandra Betzina uses the blind-hem foot #5 for that in POWER SEWING (you can see it in the photos in the book).
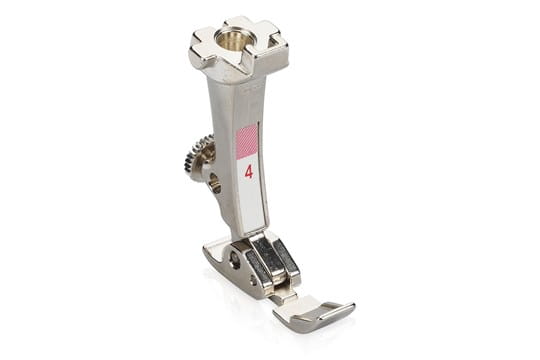
Zipper foot #4
[Bernina Zipper foot #4. Image from berninausa.com]
This foot is about 7.5mm wide, which is about nearly 5/16" wide.
Though the manual tells you to have your needle the farthest left or right position, you can have it on notch closer to the centre if you wish. I'm not sure whether this foot could be used to insert invisible zips because there is a small distance between the needle and the edge of the foot, even with the needle in the extreme left/right position. That's why I got...
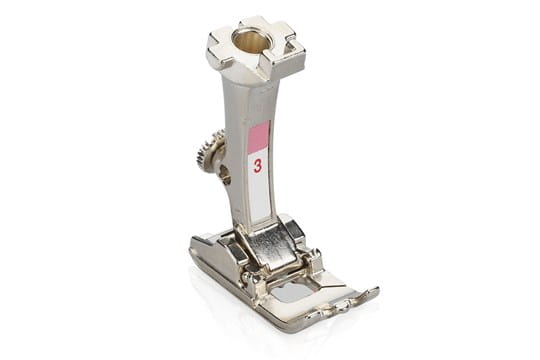
Manual Buttonhole Foot #3
[Bernina Manual Buttonhole Foot #3. Image from berninausa.com]
Ha! Did you think I was going to say "invisible zipper foot"? In POWER SEWING by Sandra Betzina, she says, and shows in a photo, that you can insert invisible zips with the manual buttonhole foot #3. I have also seen this foot used for heirloom sewing techniques, and it can be used for sewing cording too. Well, you know how I like versatility, so I asked for this foot and they kindly included it for free. (It isn't included as standard.)
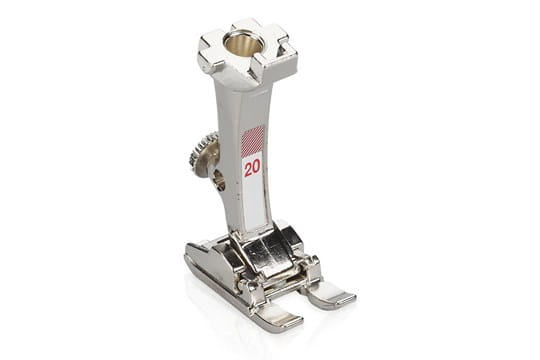
Open Embroidery Foot #20
[Bernina Open Embroidery Foot #20. Image from berninausa.com]
This foot helps a lot when you sew satin stitches because it has a wide groove underneath to allow the dense stitches to pass through. If you tried satin stitching with foot #1 you'd find the patterns kept getting shorter-looking and shorter-looking because the dense stitches build up at the presser foot and stop the fabric from feeding through easily, like a traffic jam. I'm not much good at doing any other effects with this foot yet, but that might be due to a lack of stabiliser.
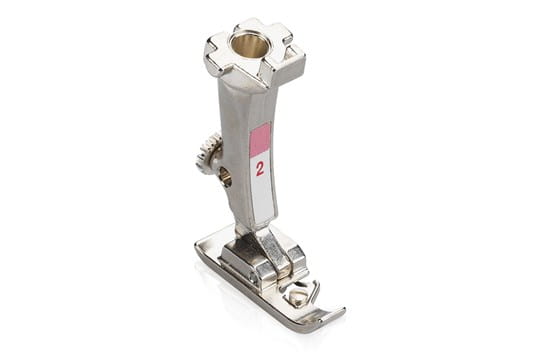
Overlock foot #2
[Bernina Overlock Foot #2. Image from berninausa.com]
A sewing machine's "overlock" feature is not to be confused with an overlocker/serger. It does not cut off the fabric for you. It simply sews over the cut edge of the fabric to hold the fabric's threads together and prevent fraying.
Using this foot with vari-lock stitch #3 (which looks like a shorter, mirrored blind-stitch) you can sew and neaten narrow seams in one go (as long as you have cut them already of course). It is good for jersey and can be used at necklines and such things on t-shirts. If you are going to use a zigzag stitch with this foot, move the needle a notch to the right, and widen the stitch so that the needle doesn't hit the little metal bar on the foot.
The bar is what keeps the raw edge down to stop it from curling up. It also means that there is extra thread in the stitch, which Bernina says allows some stretch to remain (presumably helping to prevent broken stitches and seams).
Also included are the reverse pattern foot #1 and the automatic buttonhole foot #3A (the A means automatic). Foot #1 is the standard foot, and it's fairly obvious what foot #3A does, so I won't go into those.
Features
I'm glad I got this model because the mirror function really does come in handy. The pattern end function is great too. These functions stay activated for all stitches even as long as you have them switched on. So if you mirror and pattern-end one stitch and then change stitches, it will mirror and pattern-end the next stitch. Easy enough to deactivate though; you just press the button again or press [clr].
Automatic Buttonholes
There are four automatic buttonholes on the Bernina 380: a standard buttonhole, a stretch buttonhole, a keyhole buttonhole, and a bound-buttonhole/leather buttonhole. Each is adjustable in stitch width and length.
[Buttonholes on a remnant of stretch denim]
[Standard buttonholes. I think I made them narrower than standard. Here you can also see two of my favourite decorative stitches: a flower and a tracery scallop.]
[Bound buttonhole stitch on the left, Keyhole buttonhole on the right.]
[More Keyhole buttonholes (centre) and standard buttonholes (outer) --Yes, I missed the B out of my name on the alphabet stitches.]
I think there are several uses for the bound buttonhole stitch:
- bound buttonholes (obviously)
- buttonholes on non-woven fabrics
- sewing on labels
- bound/welt pockets
- embroidered letterbox slots
- staying hand-stitched buttonholes should you wish to make some
Any other ideas?
Knee-lift
While this is necessary for attaching the buttonhole compensation plates, I don't know that I will use it all that often, at least not while my sewing table is also the dining room table. I consider it quite unladylike to sit without one's legs together, don't you? I wouldn't want it to become a habit. Still, it's nice to have it should I want to use it.
Sewing table/extension table
This is very nice to have. It takes a bit of strength to put it on and get it off, but it makes free-motion embroidery so much easier. Plus, it came with an accessory that I didn't know what included: the sliding seam guide! I haven't had a use for it yet, but I've only been playing with my new B380 so far.
It has marking on it for measurements in both directions, taking centre needle position as point 0. There is also a bias marking for sewing corners. I imagine this is for quilters, but I haven't done much quilting so I can only assume it's for piecing triangles and such things.
Foot pedal with self-storing cord
The self-storing cord is one of my favourite features, and will be appreciated by anyone who hates having loose wires in their drawers.
Cover with pockets
I can keep all my accessories with my Bernina 380 because they all fit in the pockets that are on three sides of the cover. I keep my walking foot, buttonhole compensation plates, and knee lift in the left one; my foot pedal and power cord in the right one; and the extension table, manual, accessory catalogue, and accessory box in the large one at the back, which has a flap.
The cover, when it's new, has that horrible smell of plastic. If you fell prey to the dance-mat craze of the early noughties, you will know the smell. But it's beginning to wear off now, after four or five days.
Accessory Box
This is a zip-up case with a sort of velourish divided section for the feet and othe accessories. Most of the space is for the feet. In the bottom right hand corner is where you keep the buttonhole foot #3A, right next to the bobbins (5 are included; one is is the machine). They also include some Mettler thread, which I think is rubbish because it's so fluffy and leaves lint on top of your machine when you wind a bobbin, so I'll stick to Gutermann. Anyway, I've left the Mettler thread in the large section of the box along with the spool guards, needles, quick-unpick (which I think is the sharpest one I've ever had) and those foam things that go on the horizontal spool pin before the spool to stop it from rattling or unwinding too fast (I think).
I also keep the stitch card in there. Some people find these annoying, but they're just as good as having the stitch on-screen to me, if not more convenient.
What made me choose the Bernina 380
As you may know, my Brother XR6600 spat a needle end at my eye because the needle bar had moved (thankfully, it didn't go
in my eye, but very nearly) so I would not use it anymore. I still had a Toyota 21-DES but that is a very simple sewing machine and wouldn't do much of what was in the book
Fine Machine Stitching that I got for my birthday. So I wanted a more advanced sewing machine. I also wanted one that was built to last, and you can see photographs of inside the Bernina 380 on the internet so I knew it was sturdy (if somewhat heavier).
I
was considering the Bernina 530 because of the extra stitches, wider sewing space and adjustable foot pressure, but it's bigger, heavier and more expensive. Plus,
people who actually own the B380 (and the
1008 which doesn't have adjustable foot pressure either) have said that their machines sew through chiffon just as easily as through heavy wools. Plus the B380 comes with a walking foot, which makes all the difference with stretchy fabrics that are prone to going wavy. I'm glad I chose the B380 because it's quite heavy enough and big enough for me. I don't think I could have lifted the B530 without straining myself.
Conclusion
I don't think I could include in one post all that you can do with the Bernina 380. I do mostly dressmaking, and I am getting interested in practical heirloom sewing and will be doing only a little quilting (only extremely basic for making a laptop cover), so techniques I learn will come up on this blog, even if only mentioned. I now have a machine that can do beautiful decorative sewing (including alphabets!) and exquisite top-stitching, and a myriad of other effects once I learn them and have a go. I think as I go along, I may be rewriting the manual for the Bernina 380 on this blog, because the manual leaves something to be desired (more content).
Do you have the Bernina 380? If you do and you have blogged about it, please leave links in the comments below!
Sabrina
P.S. I got Bernina 380 from over the phone. It came two days after I ordered it and the extra accessories (buttonhole foot #3 and compensation plates) came the day after that.
Labels: bernina, sewing machine


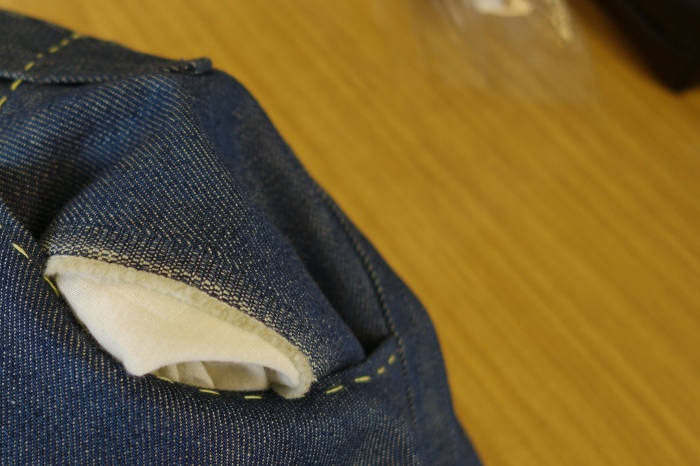
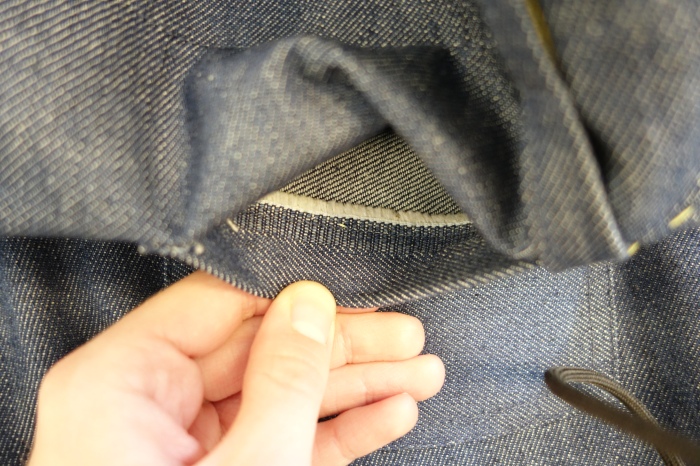
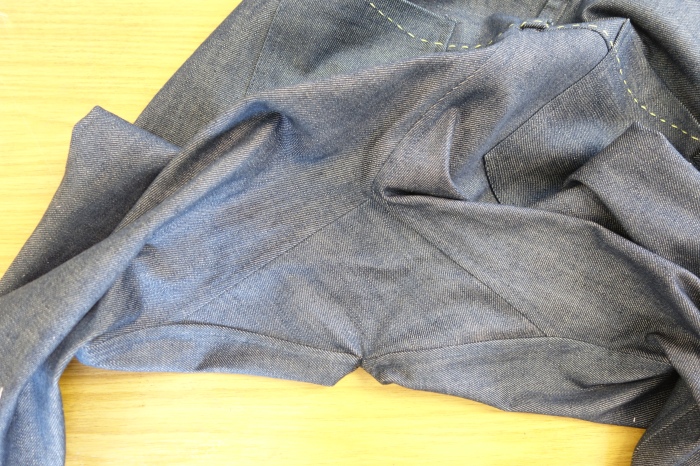
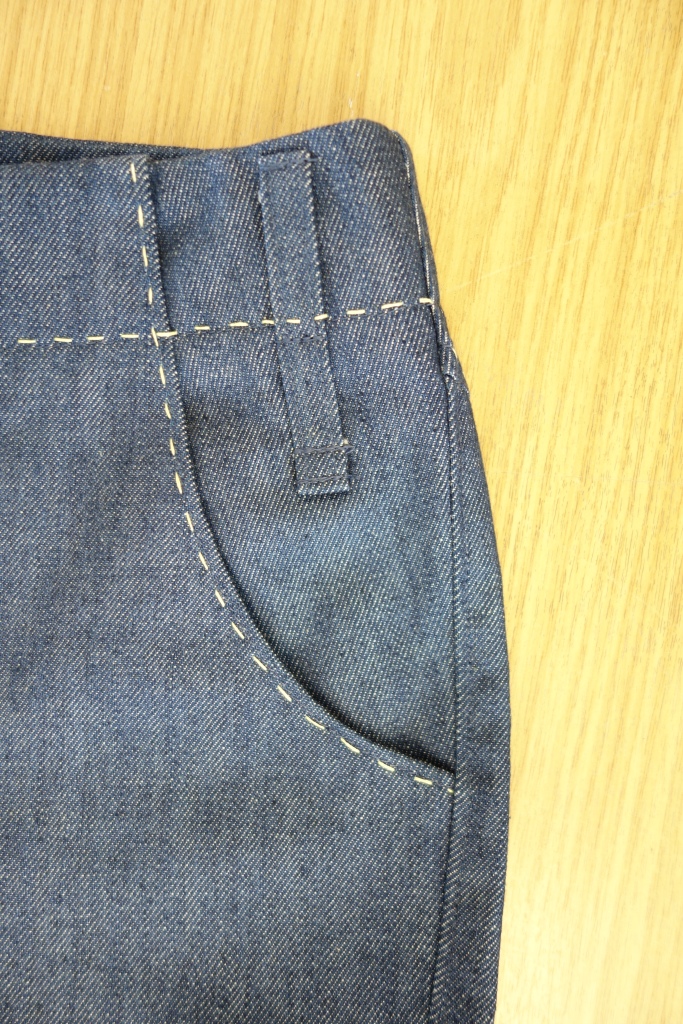
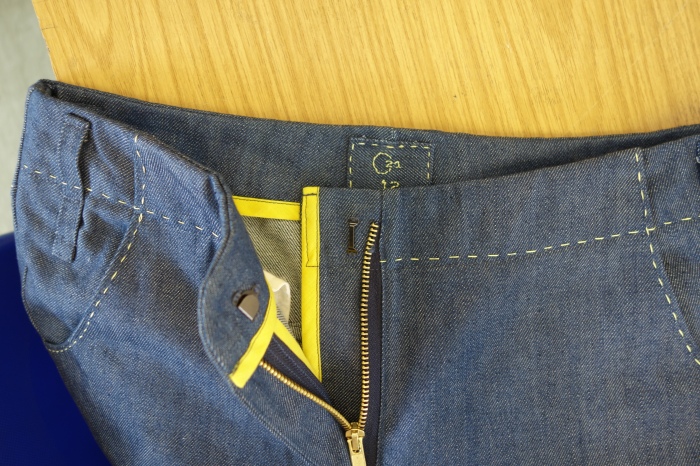
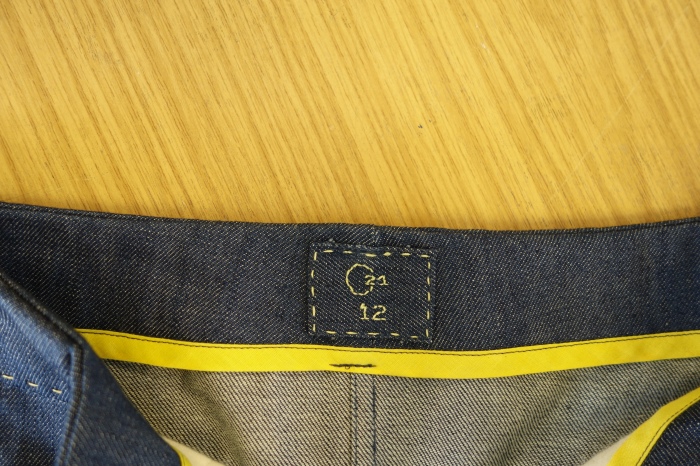
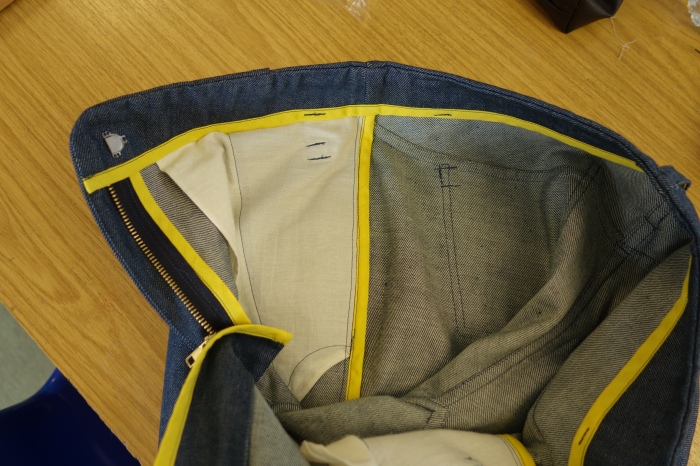
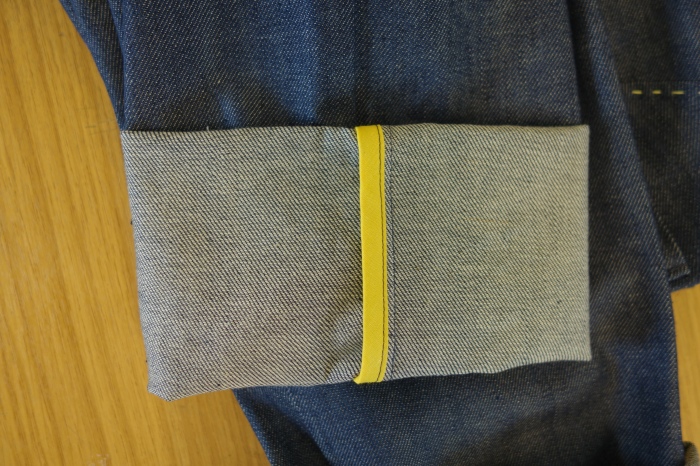
 Some features I chose to include in the jeans were: a slightly lower front waist so it doesn't dig into you; a gusset between the legs to avoid the "slicer seam" problem; and purposes, a contoured waist-facing instead of a traditional straight-cut waistband, giving a better fit and less bulk, as well as cleaner lines for the aesthetic. I wanted slim-fit legs, turn-ups, and, eventually, a back yoke shaped like a traditional shirt hem, just because.
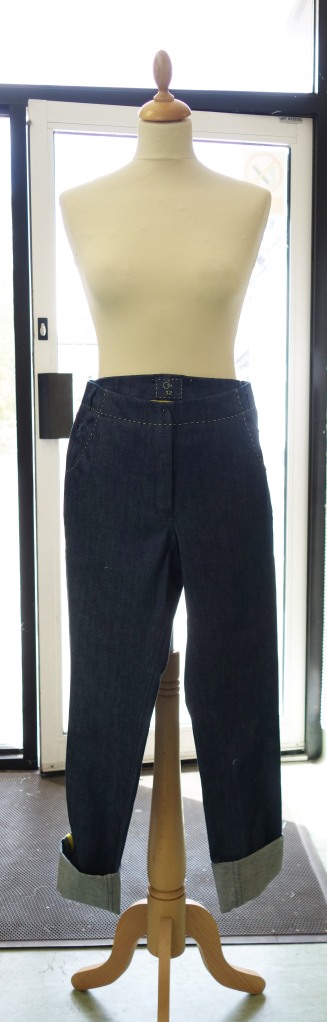

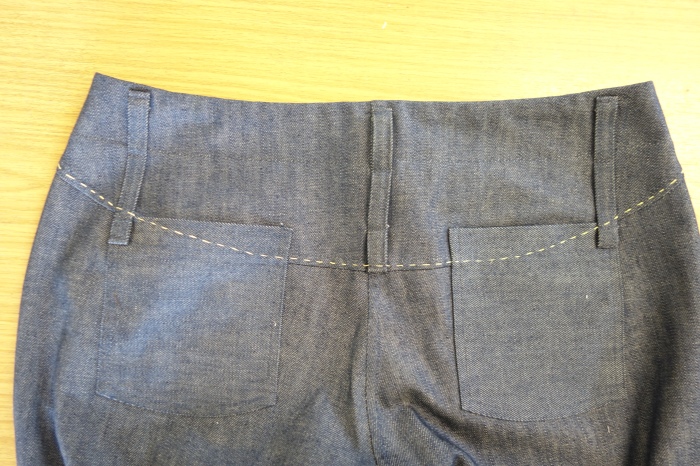
 Granted, they would look better on a person. :)